If you regularly use Google Docs to create content for your website, then you’re probably well aware of how useful this free tool is.
However, there are a ton of shortcuts, apps, and built-in features that you might not be using. By reading through and applying the hacks highlighted in this post, you’re going to turn yourself into a Google Docs expert.
Becoming more efficient and proficient with Google Docs will allow you to write faster, collaborate better, and get more work done.
Below you’ll learn about the ins and outs of Google Docs and hopefully learn about a few cool features you didn’t know existed.
Writing
Most people use Google Docs as a pure writing tool. To improve your word counts and become a more effective writer, check out the cool features below:
1. Start With a Template
You’re probably used to firing up Google Docs with a blank document. But, there’s also a massive library of free templates you can tap into. If you’re looking to give yourself a head start can find whatever kind of template you’re looking for. You’ll find resume templates, brochures, business letters, and more.
Not only will you find dozens of different categories, but there are multiple different templates within each category too. You’ll be able to find exactly what you’re looking for.
You can access the template library by going to File>New. Then select ‘From template’ from the drop-down list that appears.
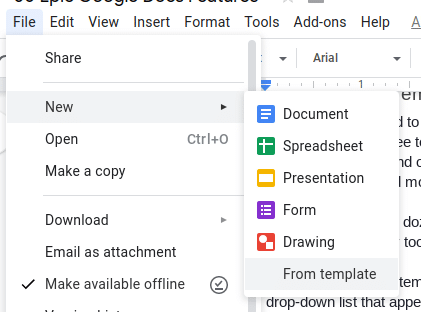
Then, you’ll be able to choose from the list of categories and templates, as shown below:
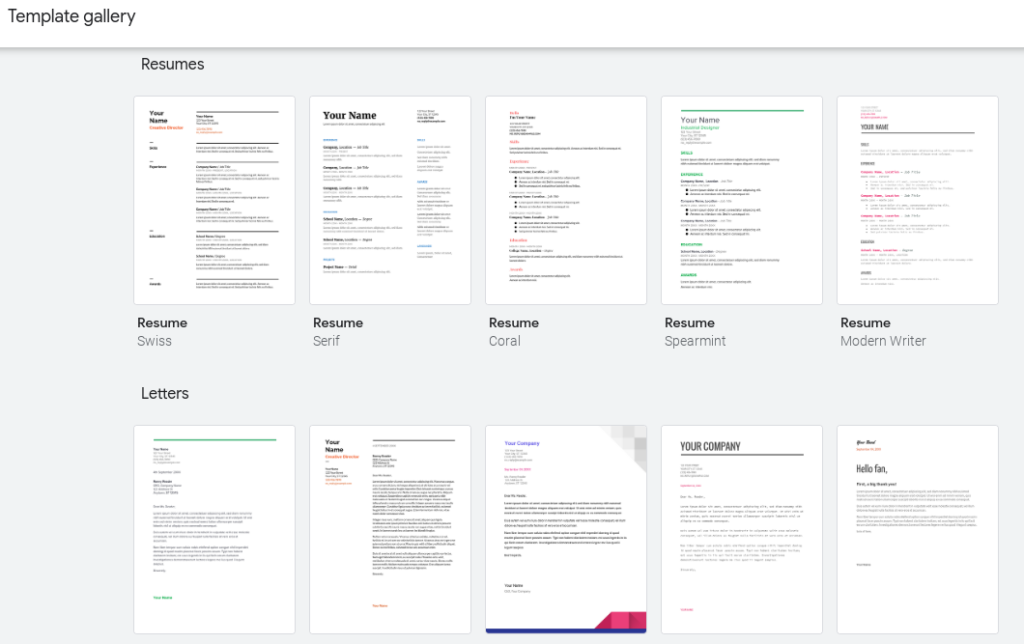
All you have to do is click on the template you want to use and start filling in the blanks.
2. Add Fonts
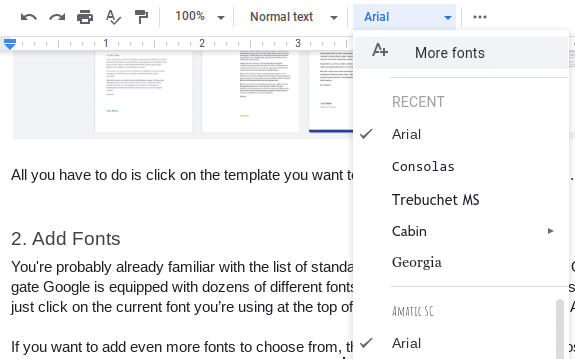
You’re probably already familiar with the list of standard fonts that Google Docs offers. Out of the gate Google is equipped with dozens of different fonts for you to choose from. To access this list just click on the current font you’re using at the top of your toolbar, for most this will be Arial.
If you want to add even more fonts to choose from, then click that same box, and choose the ‘More fonts…’ option that’s at the top of the toolbar.
Clicking this will open a new window that gives you all kinds of fonts to choose from. All you have to do is click the fonts that you want to add to the list, then click the ‘OK’ button at the bottom of the screen.
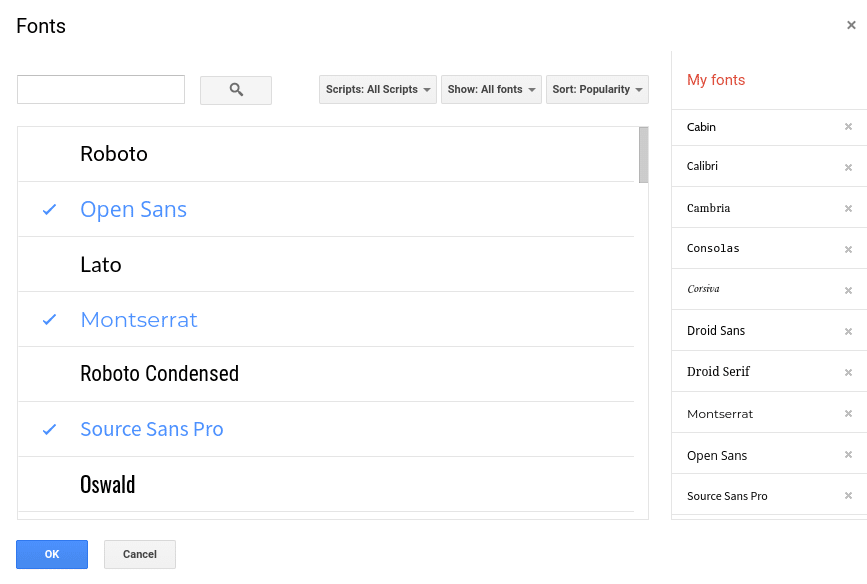
Now, you’ll be able to choose from the fonts from the standard font drop-down menu.
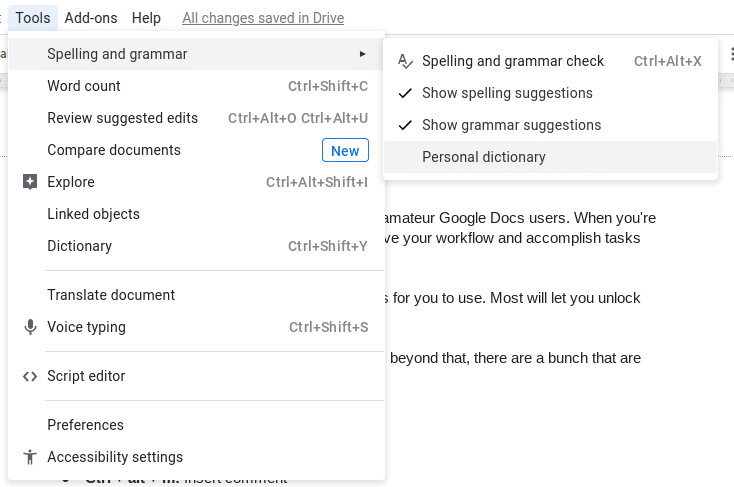
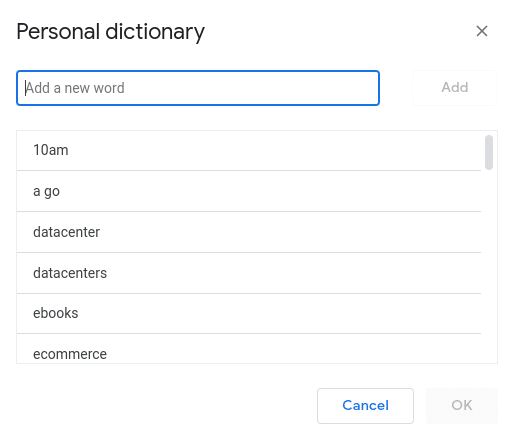
3. Add Your Own Words to the Dictionary
Are you tired of seeing the squiggly red line underneath words you know are correct? It can get frustrating to have to correct the same words again and again. Often, terms used by a particular industry haven’t made their way into the Google Docs dictionary yet.
Luckily, you can add these words to the dictionary, so you’ll never see the dreaded red line again.
To add your own words to the dictionary click on Tools>Spelling and grammar>Personal dictionary.
Then, on the new window that shows up, enter the word you want to add to the dictionary and click ‘OK.’
4. Use Keyboard Shortcuts
Keyboard shortcuts are what separates the pro from amateur Google Docs users. When you’re using keyboard shortcuts, you can significantly improve your workflow and accomplish tasks without your fingertips leaving the keyboard.
Google Docs has a ton of different keyboard shortcuts for you to use. Most will let you unlock nearly all of the features on this list.
You have the standard copy and paste shortcuts. But, beyond that, there are a bunch that are unique to Google Docs.
For example, here are a few very useful shortcuts:
- Shift + t: Create a new document
- Ctrl + alt + m: Insert comment
- Ctrl + shift + y: Open dictionary
- Ctrl + shift + >: Increase font size
For even more keyboard shortcuts spend some time exploring the entire list.
Keep in mind that what you’ll type to open specific shortcuts will depend upon what kind of OS you’re running, whether that’s Mac, Windows, or Chrome OS.
5. Create Your Own Shortcuts
If the shortcuts above aren’t enough for you, then you can create your very own shortcuts. This can give you a truly customized Google Docs experience, which can help you accomplish tasks at a much faster rate.
If you have a few shortcuts in mind that aren’t currently offered, then you can create your own by going to Tools>Preferences>Automatic Substitution. This will give you a list of shortcuts you can add, or create your own from scratch.

You can create text shortcuts, symbol shortcuts, number shortcuts, and more. Have fun experimenting with fresh ways you can improve your writing workflow.
6. Add Headers
As you’re writing, you probably don’t want all of your text to be the same size. This is especially true if you’re writing for the web.
Content on the web will be formatted in a specific way and broken up via headings. Luckily, Google Docs includes these various types of headings for you to choose from.
To select a different heading for your article, click the drop-down box that currently says ‘Normal text.’ Then, in the drop-down menu, select the heading format you want to switch to.
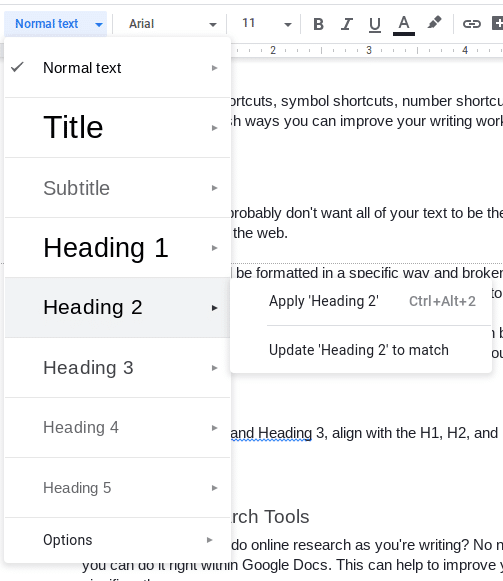
Heading 1, Heading 2, Heading 3, align with the H1, H2, and H3 tags that are used by WordPress.
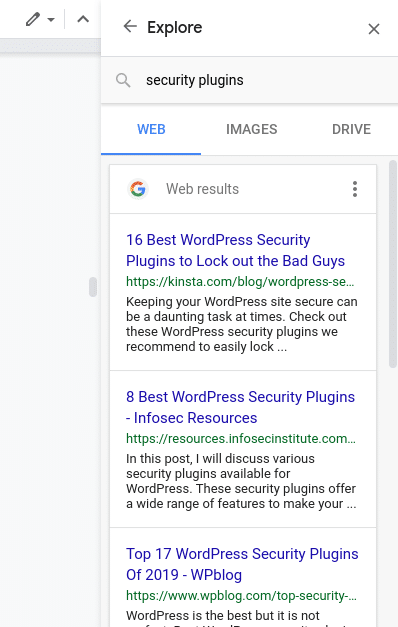
7. Use the Research Tools
Did you know you can do online research as you’re writing? No need to open up your browser, you can do it right within Google Docs. This can help to improve your workflow and efficiency significantly.
To access this tool, click on the ‘Tools’ menu option at the top of your document, then select ‘Explore’ from the drop-down list.
This will open up a window on the right-hand side of your document. You can either use the search bar to search the web, browse for images, or search through existing documents on your Google Drive.
8. Add Footnotes
Footnotes are a great way to add references to your content. Once you’ve added a footnote to your document, this will show up at the bottom of the page with a corresponding number.
Wikipedia is an excellent example of how footnotes work on the internet.
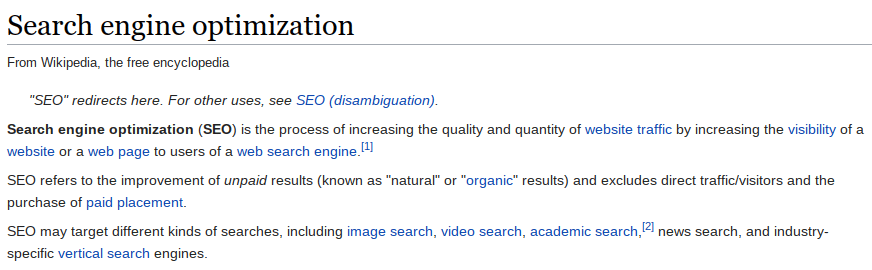
Take note of the [1] and [2] within the image above. When you click these you’ll be taken to the corresponding footnote at the bottom of the page.
If you’re creating a piece of content that relies heavily on research, then you can cite your research with footnotes.
Here’s how you can add them to your document.
First, click where you’d like the footnotes to appear. Then, select ‘Insert’ from the page menu, then select ‘Footnote’ from the drop-down list.
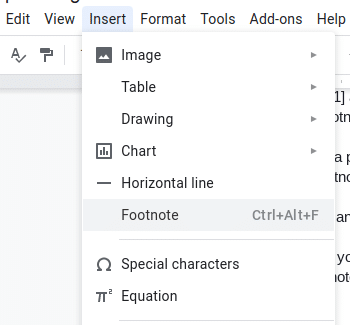
Then, type in the footnote and click save. The footnote will now appear at the bottom of the page, and the corresponding number will show up where you placed it.
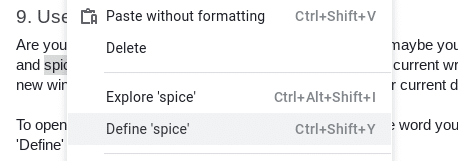
9. Use the Dictionary
Are you ever unsure if you’re using a word correctly? Or, maybe you want to find a synonym and spice up your writing? Instead of having to leave your current writing session and open up a new window, you can fire up the dictionary right within your current document.
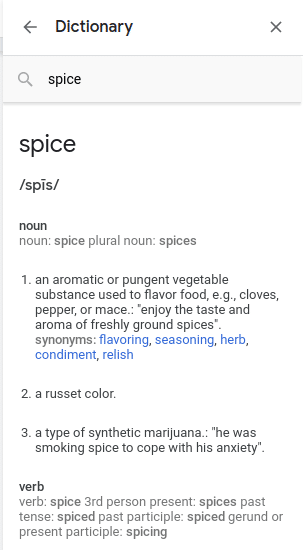
To open up the dictionary, all you have to do is highlight the word you want to examine and click ‘Define’ from the drop-down menu.
On the right-hand side of your document the dictionary definition will show up, and at the bottom of the definition, you’ll find synonyms for the highlighted word when applicable.
10. Add Language Accents
If you’re writing content in different languages, or need to add an accent to certain words, then Google Docs has your back. Instead of scouring the web for the right character, open up the language accent tool, and choose the proper accent required for the job.
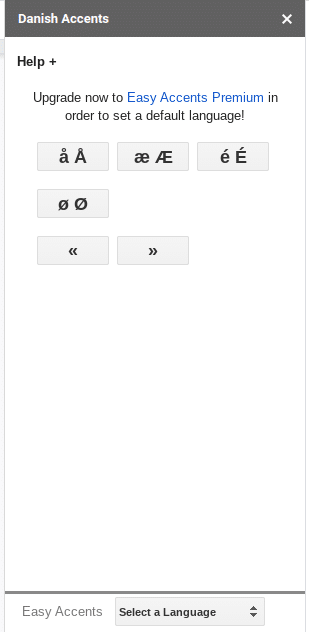
To access this tool, you’ll need to install an add-on called “Easy Accents.” This add-on will give you accents for over 20 different languages.
To install the add-on click ‘Add-ons’ from the top menu and search for “Easy Accents.”
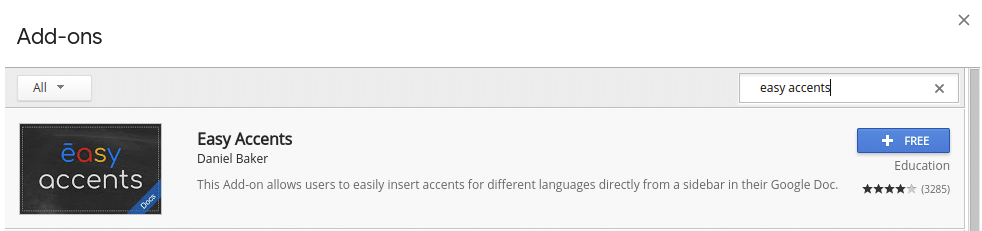
Once you’ve installed the add-on, you’ll be able to access the tool by going to Add-ons>Easy Accents. Then select your language of choice and you’ll have a list of available accents you can insert into your article.
11. Let Google Suggest Links
Let’s say you just finished an article and you realized you forgot to include hyperlinks! You could go through each sentence and see where you could link out, then fire up Google and find trustworthy sources you could link out to.
Or, you could let Google Docs do it for you. Here’s how you search for and add a link directly from Google Docs.
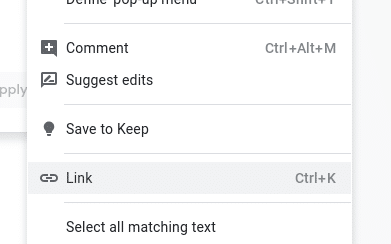
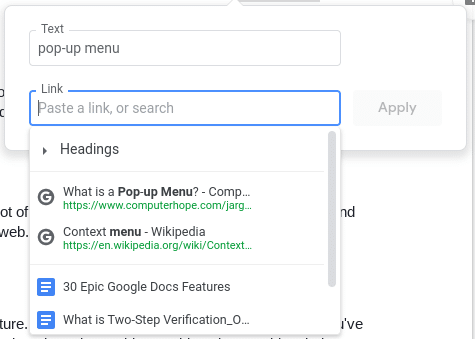
First, highlight the phrase that you’d like to link and right-click. Then on the pop-up menu select ‘Link.’
In the box that pops up, you’ll find a drop-down list of links to choose from. Or, you can click ‘Find more’ at the bottom of the list, and it’ll pull up a web search on the right-hand side of your document.
Adding links this way can save you a lot of time, as you won’t have to keep clicking back and forth between your document and the web.
12. Turn on Voice Typing
Voice typing can be a pretty useful feature. Maybe your fingers are tired from writing, or you’ve heard about the magical word counts writers have been able to achieve by speaking their words, instead of typing.
Whatever your reason, Google Docs has a built-in voice typing feature. The only caveat is you need to be using Google Docs from within the Google Chrome browser. You also need to have a working microphone, either internally via your computer, or externally, connected through your headphone jack.
Once you have those in place navigate to Tools>Voice typing.
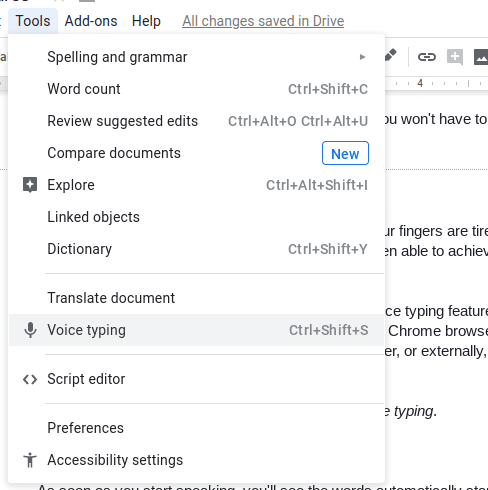
Then, click the new microphone icon, and as soon as you start speaking, you’ll see the words automatically start to appear on the page.
If you want to add punctuation to your document, you’ll also have to speak the punctuation, so “comma,” “period,” “question mark.” You can create a new paragraph by saying “new paragraph” or “new line.”
Editing & Formatting
Google Docs is a phenomenal tool for editing your work, and collaborating with others to edit and improve the quality of your work. Below you’ll learn about the coolest editing and formatting related features Google Docs has to offer:
13. Clear Old Formatting
Have you ever pasted text into a Google Doc, only to find that the formatting doesn’t align with the rest of your document? It can be a real headache to try and get the formatting just right.
You can even clear the formatting on your entire document if you notice there are little font changes, or you can’t get the formatting right.
But, there’s a little known hack for these common issues.
All you have to do is highlight the text causing you a problem, then go to Format>Clear formatting.
The text will now be in alignment with your existing content–problem solved.
14. Turn on Suggestion Mode
If you’re regularly collaborating with other people, then you might already be familiar with the commenting feature. But, there’s another way to make edits to your document without actually making edits, and it’s called suggesting.
By suggesting edits, instead of actually making them, you can give suggestions of how you’d change the text to other members of your team. This can help to improve the writing of anyone you’re giving feedback to, as they can tangibly see the changes you’d make to the document.
To turn on suggestion mode, click the pencil icon in the upper right-hand corner. Then, on the drop-down list select ‘Suggesting.’
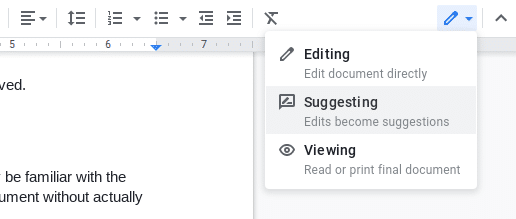
Now, whenever you make any changes to the document, these will show up as green colored marks. You’ll also see how the changes are reflected on the right-hand side of the document, and who made the suggestions.

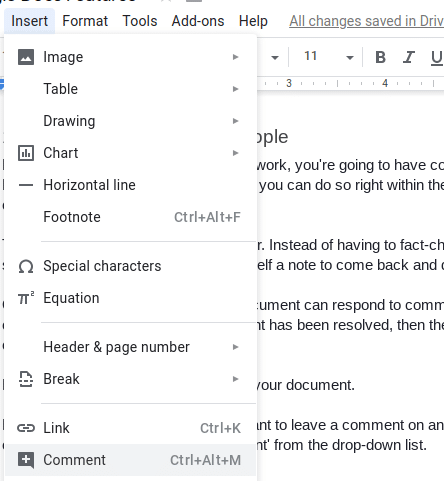
15. Add Comments & Tag People
Naturally, as you read someone else’s work, you’re going to have comments and questions. But, instead of firing up Gmail or Slack, you can do so right within the document itself by leaving comments directly in the document.
This can also be helpful if you’re a writer. Instead of having to fact-check a sentence, or look something up, you can just leave yourself a note to come back and double-check later.
Other users who you’re sharing the document can respond to comments too and create a conversation thread. Once the comment has been resolved, then the entire thread can be closed.
Here’s how you insert a comment into your document.
First, highlight the portion of the text you want to leave a comment on and click on ‘Insert’ at the top of your document, then select ‘Comment’ from the drop-down list. Or, you can right-click on the highlighted text and click ‘Comment’ from the list that appears.
You’ll notice that a comment box will appear to the right of the text that you selected. You can type your comment right into this box.
If another user has commented on your article, then you’ll notice a ‘Reply’ text at the bottom of the comment box. This is where other users can comment to create a thread.

If you want to direct your comments towards a specific person, you can tag that person in your comment. To do this type the @ sign or the + sign when you start typing a comment, then type their email address, or name.
Google will give you a list of people to tag, based upon your Gmail contacts. Once you’ve submitted the comment, an email will automatically be sent to that person. But, if that person doesn’t already have permission to edit the document, then you’ll need to give them permission to edit or comment on the document.
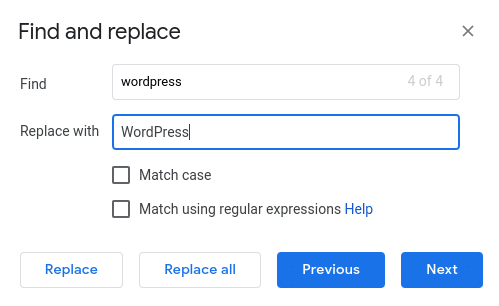
16. Find and Replace Words
If you’ve ever misspelled a word wrong for an entire article, you know how time-consuming it can be to go back and change every instance of the error. Luckily, Google Docs makes it easy to find and change every instance of that error with a single click with the Find and Replace function.
To use this highlight the error you want to change in your document, then click ‘Edit’ on the top menu. From the drop-down menu, select ‘Find and replace.’
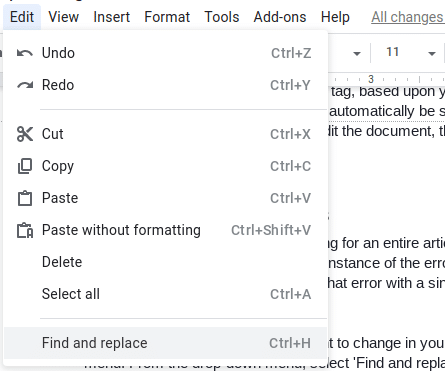
In the pop-up box, you can type the word that you’d like to replace it with. Then, you can choose to replace the single instance of the word or select ‘Replace all’ and correct it across the entire document.
17. Translate Your Doc to Another Language
Google translate isn’t the perfect way to translate your documents. But, it does give you a rough translation that should, at the very least, be readable.
If you need to translate something quickly, then you can actually translate the entire document right from Google Docs.
All you have to do is navigate to Tools>Translate document.
Then, you’ll create a new file and select the language you want the document to be translated to.
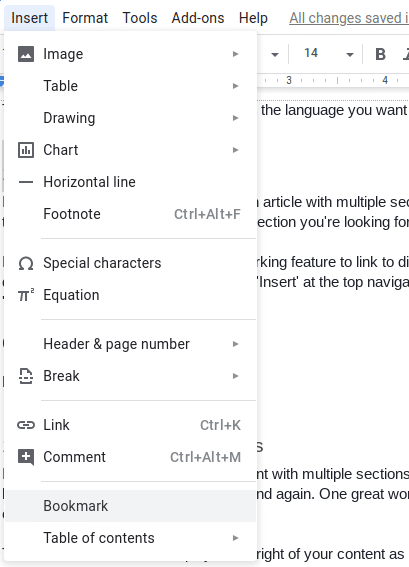
18. Add Bookmarks
If you’re creating a long document or an article with multiple sections it can get time-consuming to continuously scroll down to find the section you’re looking for.
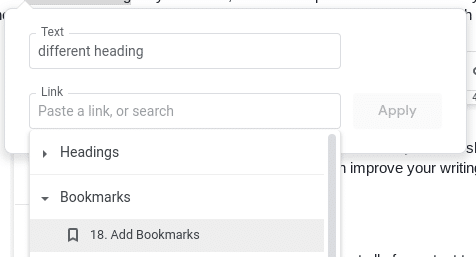
Instead, you can rely upon the bookmarking feature to link to different sections of your document. To use this feature, click on ‘Insert’ at the top navigation menu, then select ‘Bookmark’ from the drop-down list.
Now, you can link to your bookmark from anywhere else in your post. All you have to do is highlight the text you want to link, right-click and select ‘Link’, then select your bookmark from the drop-down list.
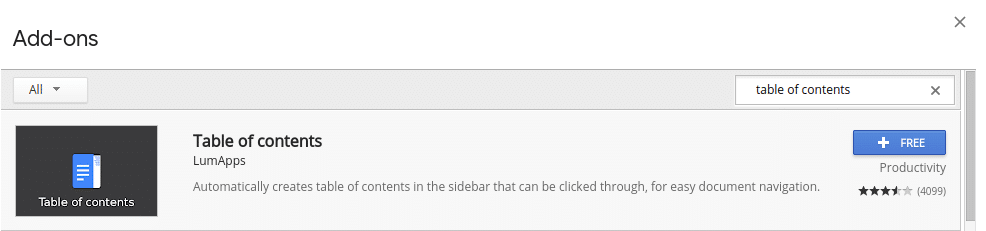
19. Create a Table of Contents
If you have a long and detailed document with multiple sections, it can get time-consuming having to scroll down endlessly again and again. One great workaround is to add a table of contents to your document.
The table of contents will display to the right of your content as you’re writing, so it’s always accessible. Then, if you want to jump to a specific section, click the corresponding headline, and you’ll automatically be taken to that portion of your document.
To activate this, you’ll need to install an add-on which is aptly named ‘Table of Contents.’ To install this, click on ‘Add-ons’ at the top of the page, and search for “Table of Contents.”
Once it’s installed and activated you’ll now see a table of contents to the right of your doc, which will easily help you jump between sections of your post.
20. Edit Images Within Your Content
Did you know that you can edit images from within Google Docs itself? Just because you added a picture and it isn’t perfect doesn’t mean you have to head back to your photo editing program.
With Google Docs, you can still edit an image after you’ve inserted it into your article.
All you have to do is click on the image you’d like to edit, and the top toolbar will change and give you image editing options. There are a lot of things you can do like cropping, adding borders, adding a mask, and a lot more.
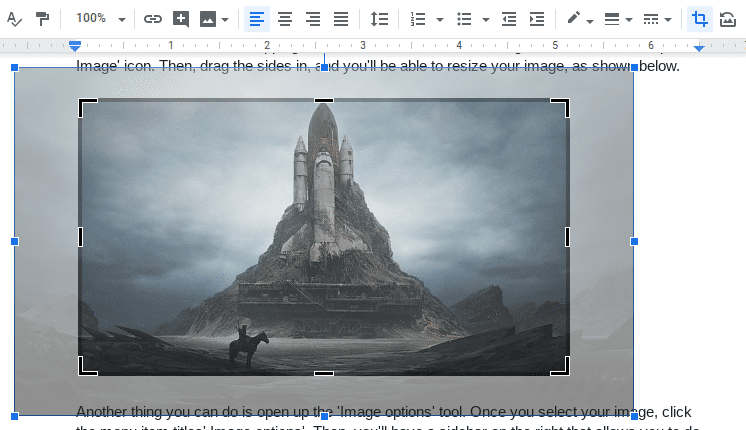
For starters, we have the cropping tool. To use this, click on the image, and select the ‘Crop Image’ icon. Then, drag the sides in, and you’ll be able to resize your image, as shown below.
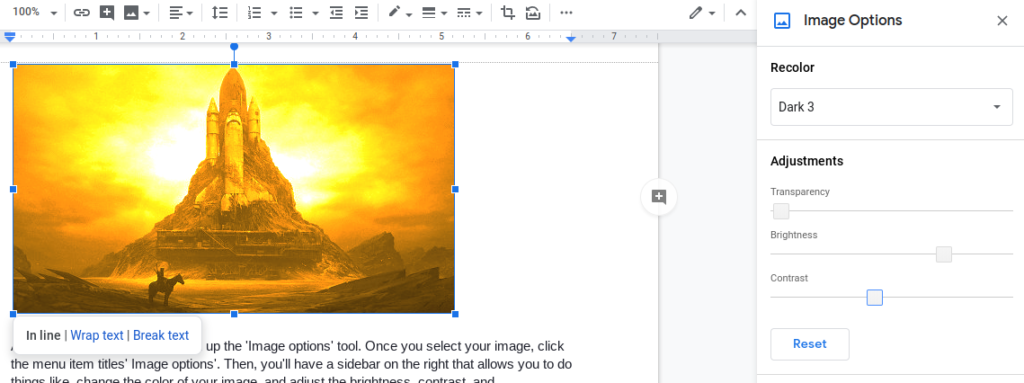
Another thing you can do is open up the ‘Image options’ tool. Once you select your image, click the menu item titles’ Image options’. Then, you’ll have a sidebar on the right that allows you to do things like, change the color of your image, and adjust the brightness, contrast, and transparency.
21. Add a New Page
For most user’s setup, Google Docs won’t automatically add new pages as you’re writing. This can be helpful if you’re creating a multi-page document.
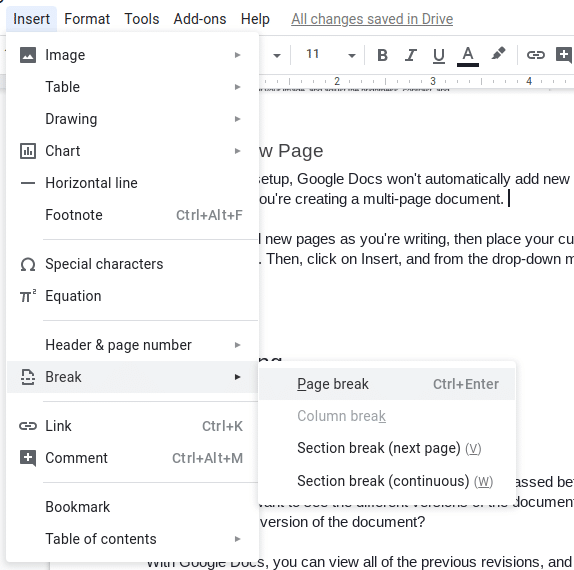
If you want to add new pages as you’re writing, then place your cursor where you want the page break to show up. Then, click on Insert, and from the drop-down menu, select Break, then Page Break.
Collaborating
Google Docs is built to be used with other people. Whether you’re working on an article together, passing your work on to an editor, you’ll want to know about these collaboration features:
22. Review the Version History of a Doc
If you’re doing multiple revisions to a document and it’s passed between numerous rounds of edits, you might want to see the different versions of the document. Maybe you’d even like to revert to an older version of the document?
With Google Docs, you can view all of the previous revisions, and even restore to an earlier version of the document.
To do this navigate to File>Version history>See version history. Then, on the right-hand side of the document, you’ll see a tab that shows who made changes to the document and the time that the changes took place.
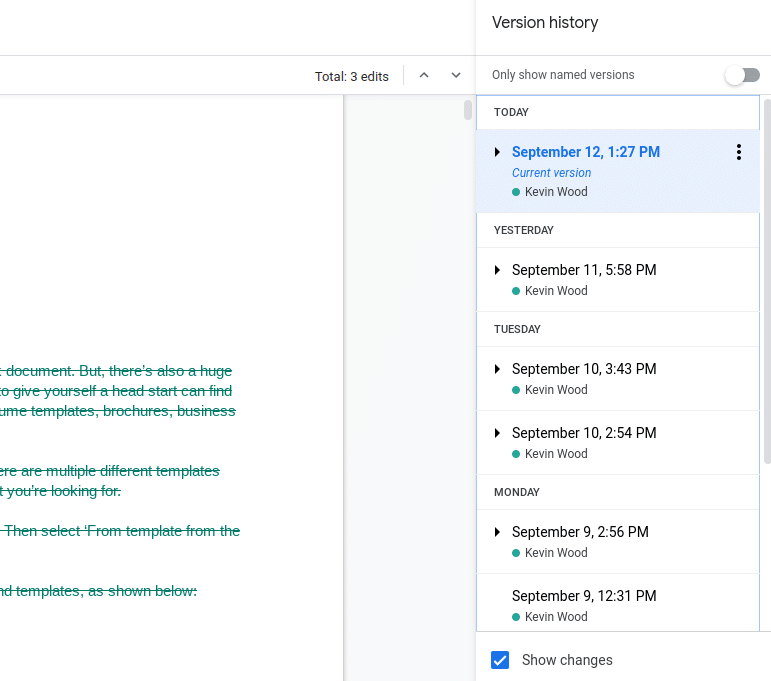
You can also restore your document to a previous version by clicking on one of the previous versions of the document.
23. Share Your Document With Others
Maybe you like to create your initial draft away from the world, with only your eyes to see it. If so, you can create your first draft and bring other people into your document later.
To do this just click the blue ‘Share’ button in the right hand corner of the screen.
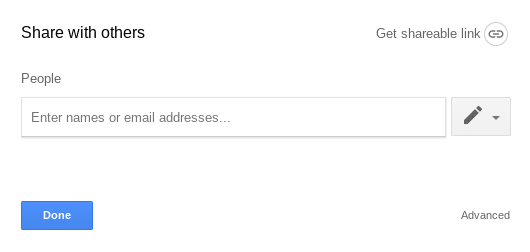
Then, you can either enter the email address of the person you want to share the document with, or you can create a shareable link. When you enter the email address of the person they’ll receive an email to access the document.
While, if you want to create a shareable link, you can link to this when you’re sending an email, or reference it from another document.
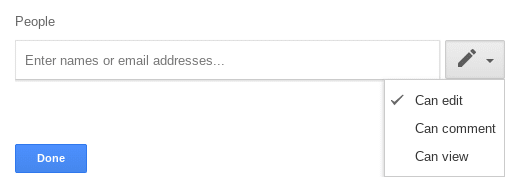
You also have the ability to choose the sharing settings. For example, you can give people the ability to view, edit, or comment on a document.
24. Conference Calling or Screen Sharing Your Doc
Google Docs was built to make it easy to collaborate on whatever you’re working on.
As a result, you’ll have several collaboration tools built into the platform. One of those actually lets you present your document in front of other people.
To turn this feature on you’ll need to install an add-on called ‘UberConference.’ This will allow you to turn your existing Google Doc into a live conference call. This way everyone on the call can see and edit the document as you discuss changes.
Instead of having to go back and forth with all your document edits, you can do it all at once.
To install this application go to Add-ons>Get add-ons, then search for ‘UberConference.’
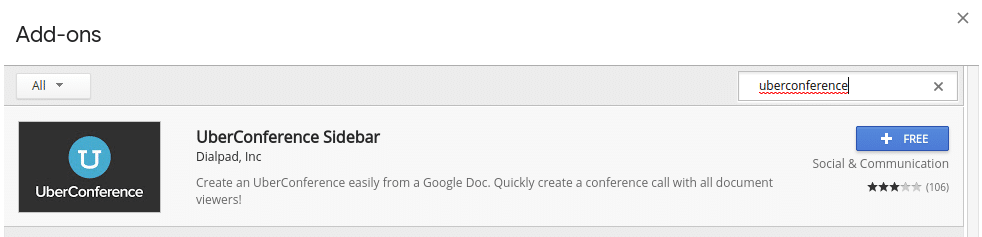
Once the application is installed, you can turn on UberConference by going to Add-ons>UberConference. Then, you’ll have a sidebar on the right-hand side where you can initiate the call.
Extras
Beyond all the features highlighted above, there’s even more we couldn’t squeeze into the above sections. If you want to link up your Google Docs to your existing WordPress site, export your document into other formats, or something else entirely, then this section is for you:
25. Link it up With Microsoft Word
Microsoft Word is one of the most popular word processors in the world. Chances are, you’re going to have to work back and forth between Google Docs and Word a lot.
To make your life easier, you can install a Google Docs add-on for Chrome that will automatically convert Word files into an editable format within Google Docs.
To install the add-on, head over to the Chrome web store and search for ‘Office Editing’.
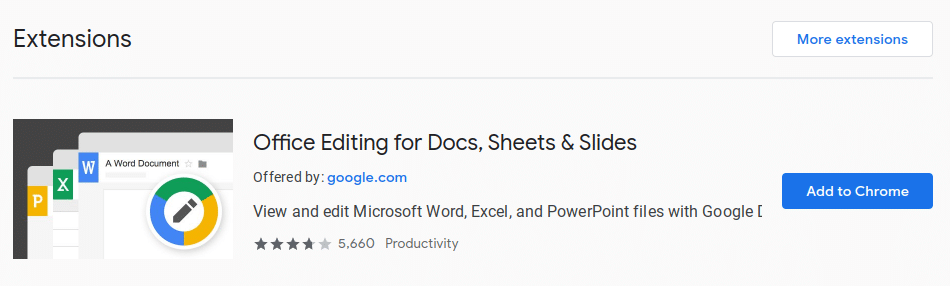
Once you install the add-on, you’ll be able to import .docx files, and they will be automatically converted to a useable format.
Then, if you want to convert the File back into the Word version, navigate to File>Download, then select ‘Microsoft Word’ from the list.
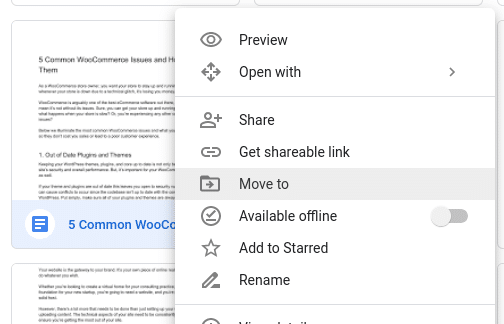
26. Organize Your Content With Folders
Google Docs stores all of your documents in the cloud. These automatic backups can be a real blessing, but in time your Google Drive can become very disorganized. This is doubly true if you’re sharing folders on Google Drive with other members of your team.
But, if you want to take back control of your document organization, then you can do so within Google Docs. This can be helpful if you’re creating a series of articles, or have a variety of different documents and files that you’ll want to keep together.
To do this, we’re going to head over to Google Drive. Once you’re inside, click on ‘New’ button that has a big plus sign next to it. Then, select ‘Folder’ from the drop-down list.
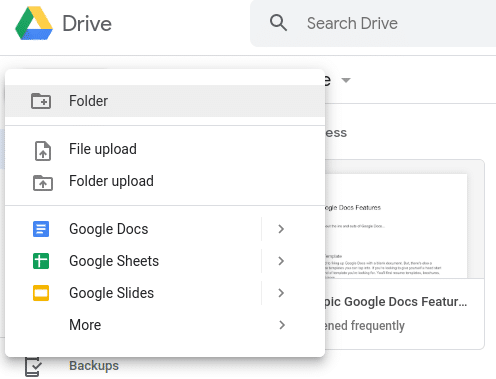
Then, you can move any existing documents or files into that folder for more accessible organization.
If you want to move an existing file, right-click on the document, select ‘Move to’ from the drop-down list, then select the folder you just created.
27. Access Your Work Offline
Google Docs is an online tool, but you can also use it offline like a standard text editor. This can be useful if you’re working on an article on the go, and won’t always have access to the internet.
If you want to work on a document when you’re offline, select File>Make available offline.
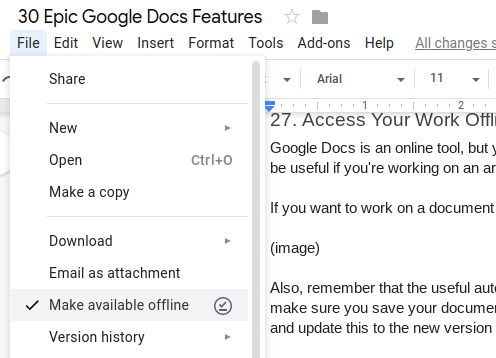
Also, remember that the useful autosave function won’t work when you’re writing offline, so make sure you save your document often. Google Docs will keep a local file on your computer and update this to the new version once you connect to the internet again.
28. Explore the Add-on Library
If Google Docs isn’t feature-rich enough for you, then you should spend some time exploring the add-on library. You’ve probably already seen a few quality add-ons mentioned in this post, but there are hundreds more.
Just select Add-ons>Get add-ons. On the pop-up screen, you’ll see the Add-on library home screen.
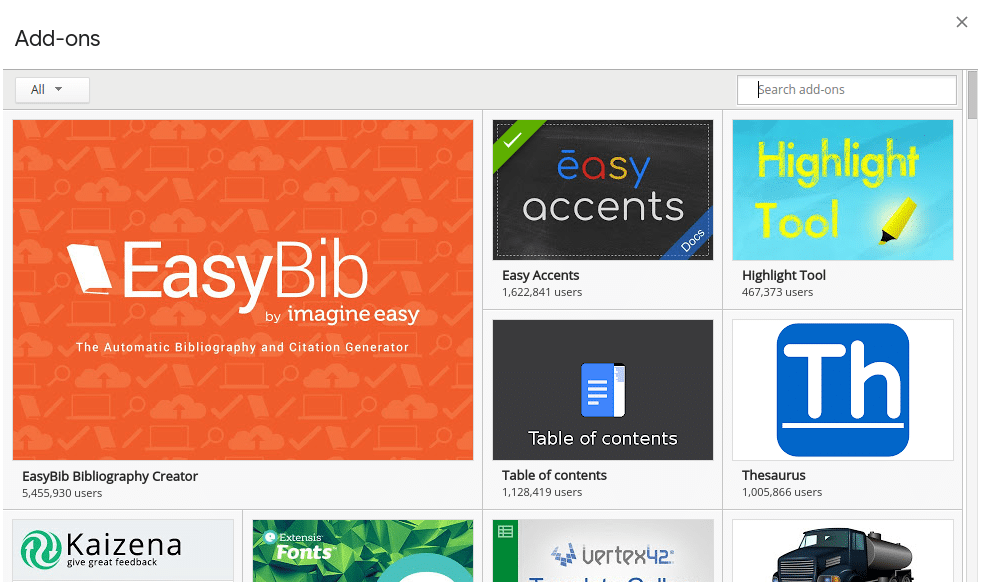
Here you can install popular add-ons, browse by category, or even search for a specific keyword. A lot of the add-ons are free, but for more features you’ll usually have to pay. However, this could be worth it depending on how often you use the extension.
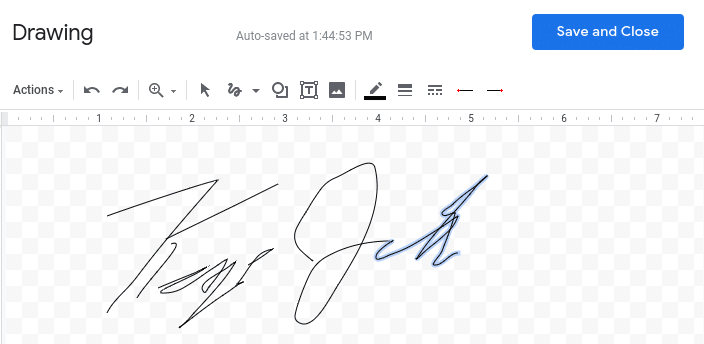
29. Add an E-signature to Your Doc
If you’re creating a business document that requires your signature, you can actually sign it right within Google Docs. For the simple signature insertion method, all you have to do is go to Insert>Drawing, and then click on +New. Then, you can draw out your signature with your trackpad or mouse.
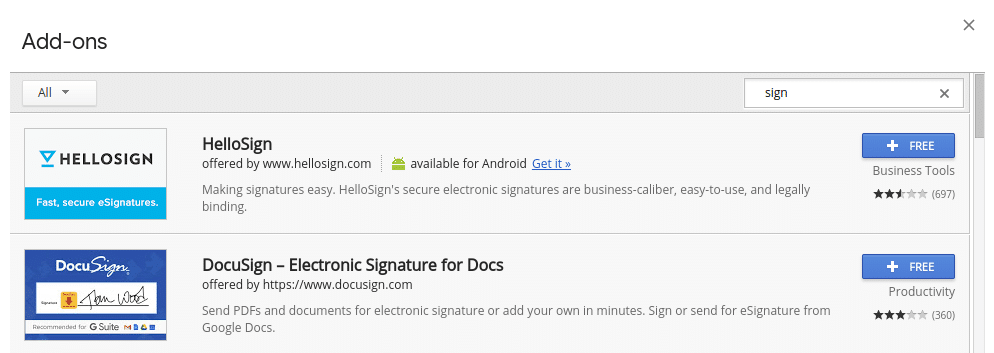
If you want to insert a more official signature, then you’ll need to install an add-on like Docusign or Hellosign.
To install one of these click on Add-ons>Get add-ons, then search for one of the tools mentioned above. Once you’ve installed one of those tools, you can insert a professional signature into your documents.
30. Connect Your Doc to WordPress
If you’re a WordPress user who writes blog posts in Google Docs, then you can link the two together to streamline your publishing process.
If you’ve ever pasted a Google Docs document into WordPress, then you’re probably aware of all the formatting issues this can create.
Luckily, there are two easy solutions you can implement to make this process much easier for you:
1. Use Jetpack and the Chrome Extension
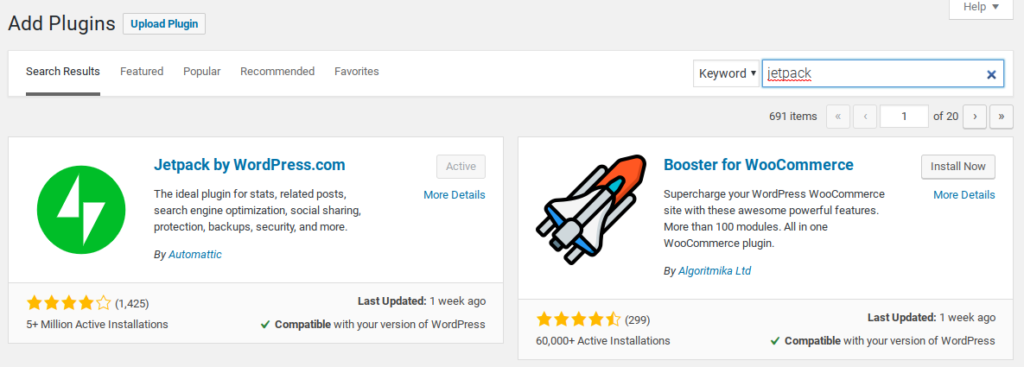
Jetpack is a plugin that you might already be using on your Wordpress site. If so, then all you need to do is install a browser extension and you’ll be able to easily link the two together.
To install Jetpack you’ll need to be logged into your Wordpress dashboard. Then, once you’re in the backend navigate to Plugins>Add New and search for “Jetpack”.
Once the plugin is installed, you’ll need to sync it with your current Wordpress site.
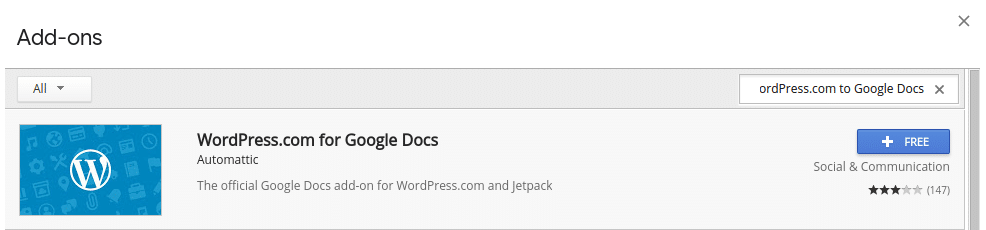
Now, it’s time to install the Google Docs add-on. Install the add-on by going to Add-ons>Get add-ons and search for “WordPress.com to Google Docs”.
To link Google Docs and your Wordpress site together navigate to Add-ons>WordPress.com for Google Docs>Open.
Then, on the right hand side of the document you’ll be able to add your WordPress site. Then, you can publish posts directly to your WordPress blog. You’ll notice that when the posts are on your blog feed the formatting will be perfect, and images will transfer over as well.
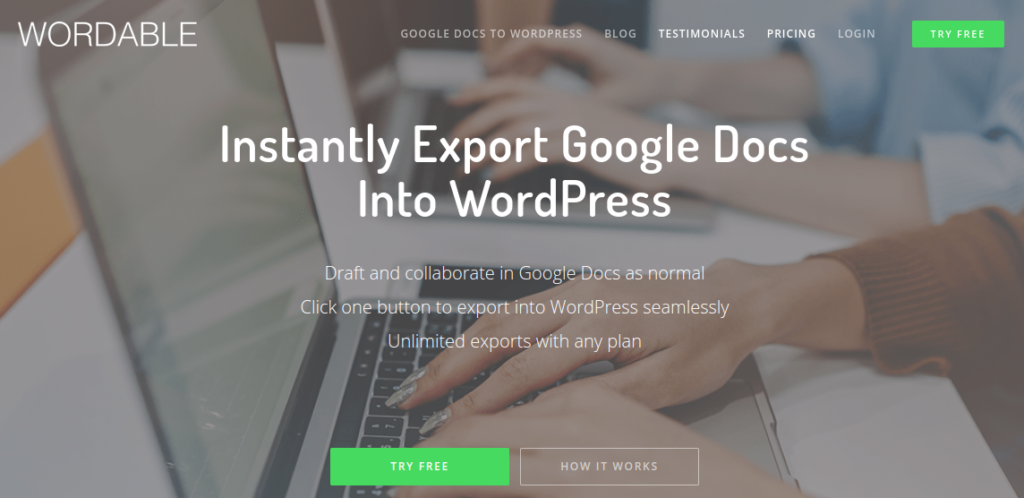
2. Use a Plugin Called Wordable
Wordable is a premium plugin, but it was built from the ground up to make integrating Google Docs and WordPress as simple as possible.
With this plugin installed you use Google Docs as you normally would, then import the document into your WordPress site.
If you’d like to give the plugin a try, you have an initial 7 day free trial period that lets you import 3 different documents.
Before you install the plugin you’ll need to create an account, so you can link your WordPress site. So, head over to Wordable and create an account (https://www.wordable.io/).
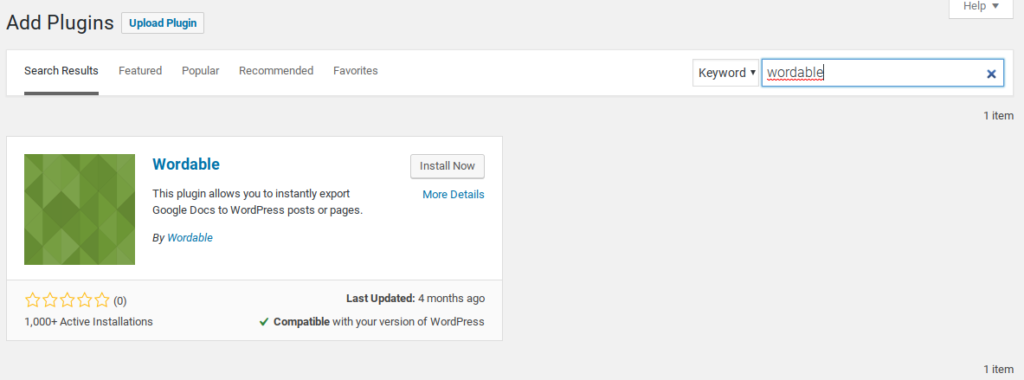
Then, install the plugin on your WordPress site by navigating to Plugins>Add New, and search for “Wordable”.
Once the plugin is installed on your site and your account is created you can import content directly from your Google Drive.
The plugin will automatically create a folder within your Google Drive where you can choose posts from, or you can search for content you’ve already created.
Then, all you have to do is click the ‘Export as Draft’ button and the post will automatically show up as a blog post draft. All that’s left for you to do is click ‘Publish.’
Closing Thoughts
By now you’re on your way towards becoming a Google Docs master. If Google Docs is an integral part of your workflow, then you must implement a handful of the tips covered in this post.
As you become more familiar with, and customize Google Docs to your unique needs, you’ll become a much faster worker. No matter what you use Google Docs for, being able to work faster is a great benefit.
Now over to you. Do you have any awesome Google Docs features or hacks we didn’t mention in this post? Share your favorites in the comments below.
Jamie Spencer
Latest posts by Jamie Spencer (see all)
- How To Make Money As A Kid In 2025 – 6 to 16 Years Old - December 9, 2025
- 17 Of The Best Google Adsense Alternatives 2025 - October 13, 2025
- How to Start a Successful Cryptocurrency Website - September 12, 2024
Jamie, thanks. It is unclear to me how to easily move through a list of files in Google Docs, say to delete several at once. In Word, I would just use the elevator button. But the elevator button in Google Docs only takes me about 15 files down. I can then use the Page Down key to continue 15 items at a time but that is not practical if the list contains hundreds of items. Thanks.