Sometimes you take the perfect photo, but it’s just too small to show all of the detail of the subject you were attempting to capture. There are a number of situations when you need to resize a photo. More than likely, you haven’t been all that impressed with the blurry results you achieve. When you want to make images larger without losing quality there are a few things that you need to understand.
Our basic guide to resizing images can help you avoid blurry images by providing information about what is happening when you resize photos, we’ll provide you with possible solutions and we’ll also provide 3 tips for higher quality enlargements as well. The second part of this article will discuss the various software solutions available for resizing images without sacrificing quality.
Basic Guide to Resizing Images
Just about any photo editing software available has the resize images option included, and that is because resizing photos is a pretty common task. Resizing is often necessary to save file space, in the creation of professional presentations like newsletters or PowerPoint presentations, inserting photos into documents, social media background images, and the list goes on. Resizing, especially enlarging, can create distortion or blurring of the photo. This issue can be avoided and we’re about to show you how.
Why do images lose quality when they are enlarged?
The first step in avoiding distortion when you make an image larger is gaining an understanding of what happens when a typical photo is enlarged. To understand what happens, you have to understand the concept of pixels.
Pixels and Bitmap
Bitmap is the most common image format used in photographs. In fact, when you purchase a digital camera or a camera phone, one of the specifications provided is a number like 3MP, 5MP, or 8MP. The MP stands for megapixels, which is made up of 1 million pixels. These pixels are combined to make up a bitmap image. If you zoom in really tight on a photo, you will see these entities in the form of squares. Each of these squares is mapped to a fixed location on the image, thus the term bitmap.
Pixelation
Resizing an image enlarges or shrinks each of the pixels inside the image. When you shrink the pixels, you see no loss of quality in the image, because the pixels become even less visible. However, when you enlarge an image, the pixels become more visible and their mapping becomes more pronounced. The blurriness or distortion that you see with an enlarged photo has become “pixelated.”
A good example of pixelation can be illustrated by taking a look at a mountain slope at a distance. At a distance, the trees create large patches of various colors and types of trees. As you move in closer to the slope, you begin to notice the detail and textures of individual trees rather than the patches of colors.
What’s The Solution?
Now that you understand what is going on and the various issues you are facing when you enlarge a digital image, you can start to find a solution. One of those solutions is to make compensation for each enlarged pixel in order to match its properties to the nearest pixels. This is called fractal interpolation or fractals and it is what produces higher quality enlargements. Most software programs utilize fractals to create enlarged images.
Interpolation
A great example of what is going on when you enlarge a digital image is to understand what it is you are asking your computer to do. When you ask a computer to enlarge an image, you are asking it to create a new image of your photo in a larger size. In essence, you are asking your computer to guess what that image and each of its pixels would look like if it was larger. Though some software apps do a better job of guessing and recreating the image, they still have to make a guess. The greater variation of guessing or prediction that has to be made will determine how much the image is degraded. Interpolation is the prediction method used to achieve quality enlargements.
Vector Graphics
Lossless is the term used for enlarging images without losing quality. Lossless is a compression algorithm, which preserves the integrity of a graphic image and it is used in vector graphics. To enlarge a bitmap image without losing quality, you have to generate it in its vector form, enlarge the vectors and then export them back to a bitmap image. Vector imaging or vector graphics is what most of the software applications used for enlarging images utilize to make images larger without losing quality.
Three Tips for Higher Quality Enlargements
Often, the image we need to enlarge is a bitmap image instead of a vector image, so that tends to create lots of problems when we do enlargements. Though you cannot quite produce an exact replica of the original image in an enlargement, there are certain techniques that can be utilized which can make distortions and artifacts in the enlarged image virtually unnoticeable to the human eye. Here are three of those techniques:
Take Smaller Steps Up To 300% Enlargement
Rather than stating a specific image size you want to enlarge to, the better technique for allowing interpolation to be more successful at predicting the outcome of the enlarged image is to enlarge by percentages until a point of distortion is reached. In general, medium to large photos can be enlarged by 200% without any noticeable change. 300% is stretching things a little bit, but can often be achieved. However, enlarging beyond 300% is probably going to produce distortion.
By taking smaller steps up to 300% enlargement, you can maintain the quality of the image, but also make it large enough to emphasize whatever it is you are attempting to highlight in the image. Reaching that balance of enhancement with minimal distortion often rests on a very thin line.
The bigger the original image, the better
Starting with a larger image, which is achieved with higher megapixel cameras and higher dpi settings makes producing a higher quality enlargement that much easier to achieve. A smaller image will show distortion and artifacts with just the slightest amount of enlargement, but a larger image can withstand a great deal more enlargement without any noticeable loss of quality.
In relation to the tip we already discussed, enhancing to 200% on a smaller image might look even worse than enhancing a larger image to 300%.
Sharpening the image
One way to overcome the distortion of an enlargement is through the use of sharpening. Essentially, you can push your enlargement right up to the very edge of distortion and then utilize an image sharpening tool in your photo editor to clean up that distortion. Image sharpening is not a miracle tool, but it can allow you a little bit more leeway when it comes to enlargement percentage.
Remember that we said that achieving the balance between enhancement and distortion rested on a thin line. Think of the sharpening tool as a means of making that thin line just a little bit wider for achieving that balance.
With the knowledge you have gained above as well as the three tips we just gave you, you can take a little bit closer look at some of the various software solutions available for enlarging images without losing quality.
PREMIUM / PAID Software Solutions to Enlarging Images Without Losing Quality
Those who manipulate image sizes as a profession or certainly edit photographs with greater frequency will want to take a serious look at software solutions that you purchase. Professional quality editing as well as more precise tools tend to be found in these applications. Though there is a greater time investment in learning the programs and a greater monetary investment they often provide a greater return in producing a higher quality result.
Resize with PhotoShop
Photoshop is very much the king of photo editing software and it offers various tools and techniques to maintain image quality while resizing.
To resize an image without compromising its quality in Photoshop, follow these steps:
- Open the image in Photoshop: Launch the program and open the image you want to resize.
- Access the Image Size dialog box: Navigate to the Image menu dropdown at the top of the screen, then click on “Image Size.” This will open the Image Size dialog box.
- Set the resolution: In the Image Size dialog box, ensure that the resolution is set to a high value, ideally between 240 and 300 pixels per inch (ppi). Higher resolution results in better image quality.
- Use the Resampling method: In the same dialog box, you will find a dropdown menu for selecting the resampling algorithm. Choose “Preserve Details 2.0” as this method is specifically designed to maintain image quality while enlarging. This method uses advanced algorithms to analyze the image and intelligently add pixels to minimize artifacts and loss of detail.
- Adjust the dimensions: Enter the desired width and height for the image. Make sure the “Constrain Proportions” or “Link” icon is enabled to maintain the original aspect ratio and avoid distortion.
- Adjust noise reduction (optional): Preserve Details 2.0 also allows you to adjust the noise reduction slider, which helps in reducing noise in the image during the enlargement process. You can experiment with this setting to find the optimal balance between noise reduction and detail preservation.
Fotophire Maximizer
Managing and minimizing the amount of lost image quality through the enlargement process can be achieved utilizing Fotophire Maximizer software. Customizable formulas for enlarging your images are built into this software so that you can edit like a pro.
The InPixio Maximizer allows you to quickly and simply import your photo, select a preset size and resolution quality and then view a side-by-side comparison of the original with the enlargement.
You can enlarge up to 1000% of the original size without pixelation with this software and achieve high resolution close-ups which are printable. You are allowed to work with a trial version before making your purchase and utilize nearly all of the programs editing features before purchasing full rights to use the software rather than paying a monthly subscription fee. On the downside, this software does not work with Mac and the features of the trial program will be extremely limited after the trial period expires.
Vector Magic
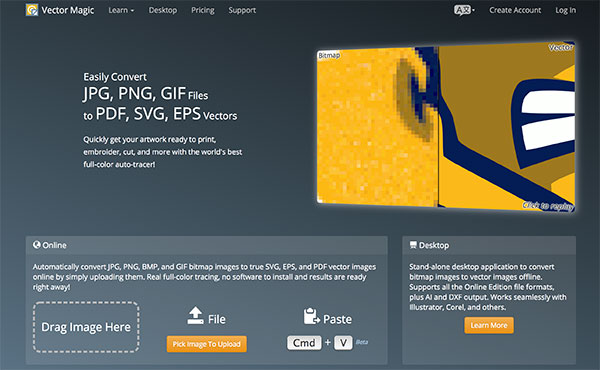
Vector Magic works by converting bitmap images like JPEG, GIF and PNG images into vector images in order to smooth out the sharp edges of those pixels. Utilizing the latest version of your software browser and flashplayer, the user interface couldn’t be any simpler, consisting of only 6 buttons and a zooming bar.
This software works great with logos, clipart and other forms of artwork and is available as both a desktop and online application. You can learn the ins and outs of the program with a trial version, but your images cannot be saved without purchasing the software.
Greater accuracy, cleaner output and a user-friendly interface are some of the best features of Vector Magic. The quality of enlarged images with limited loss is also among its positive benefits. This software also works with both Windows and Mac operating systems. Among its drawbacks are its higher initial investment and the fact that it is not designed to work with photographs as much as it is to work with graphic arts.
Graphic artists who need a solid software program for digital editing and enlargement will be thrilled to use Vector Magic.
PhotoZoom Pro 8

Regardless of how experienced you are with photo editing software, even you can get quality enlargements without distortion from PhotoZoom Pro 8. This is a desktop application with all of the enlargement and editing tools you need to produce a high quality enlargement.
There are plenty of pre-defined settings to choose from making your task a lot quicker and easier. It can also be used as a plugin with PhotoShop.
On the upside, this easy to use program works with either Mac or Windows, has multiple types of processor support and lots of cheats and pre-sets to make things easier for a beginner.
On its downside, it does not do well with processing photos in a batch and you can only enlarge photos with this software and do no enhancement editing.
STOIK Smart Resizer
The STOIK Smart Resizer is a photo enlarger program which also allows you to edit and enhance your photos with full editing features. This is a very user-friendly application, which can work with numerous types and styles of images, making it a good all-around editing program for single file or batch editing of images.
Among its positive features is allowing you to enlarge photos up to 1000%, support for both enlarging and shrinking of images, printing photos from its interface, and it works with Windows or Mac. What it isn’t so good at doing is batch resizing or processing photos quickly. It is also fairly limited in editing tools when compared to other photo editing applications.
Your upfront investment into STOIK Smart Resizer is minimal compared to many of its competitors, but it won’t quite live up to the expectation of those higher end applications either.
Free Software Solutions For Resizing Images
It might be difficult for those who are infrequent users of photo editing and resizing software to justify the time invested into learning these more advanced options as well as the expense of a full paid program. If you are among the ranks of infrequent users, there are some free, user-friendly options with a shorter learning curve that do a pretty decent job of resizing.
Gimp
The freeware alternative that is most comparable to PhotoShop can be found in Gimp. Gimp will also produce enlarged images with minimum quality loss, but that quality will still fail in direct comparison to what you will get with Perfect Resize with PhotoShop. The scaling process with Gimp is about as simple as it can get, just be sure to choose Sinc (Lanczos3) as the interpolation method whenever you scale-up your photo.
When it comes to free, open-source software, Gimp is toward the top of the heap and a great option for those who are a bit more tech savvy.
Irfanview
The compact editing program, Irfanview, provides a smart way to resize and enlarge images. Enlarging includes the selection of your new image size, the viewing of a resample and the selection of apply sharpening to the photo after resizing. Irfanview also utilizes Lanczos3 interpolation to provide the best lossless result possible among free software.
Among its most positive benefits is that it is compatible with Windows 10, it is free software, will use both 32 bit and 64 bit versions, and you can convert images to various formats with this software as well. On the downside, this software is not compatible with Mac operating systems, it can only enlarge photos up to 600 x 600 pixels, and the output quality leaves a little something to be desired.
Infrequent users will probably be okay using this enlarger for their limited needs, but those who do a lot more with image editing will find this program lacking a great deal.
Reshade Image Enlarger
A fully functional enlarger and image editing software program which also produces decent quality enlargements is Reshade Image Enlarger. The enlargement function of this application is very user-friendly and has plenty of customized or preset options to choose from. Though it doesn’t go a long way with its additional editing features, there are enough available to enhance and clean up enlargements for a clearer presentation.
Photo defects and image noise reduction is an upside feature of Reshade Image Enlarger, which also provides batch image enlarging and allows you to add focus to enlargements which have been blurred a bit. What it does not provide are advanced photo editing tools, truly high-quality results and it does not have Mac compatibility.
You can enlarge photos and clean them up a bit with Reshade Image Enlarger, and that’s just about it.
Online Solutions For Resizing Images
There are some online solutions available for doing one time enlargements, but most of the time they are designed mostly for quick editing and don’t tend to do the best job when it comes to quality enlargements. Because of their lower quality, we aren’t going to go into much detail on these options. Here is a quick rundown of some of the available online apps and programs you can try out:
- Waifu2x. This application shows very good results when used with anime images.
- Befunky. Besides image enlargement, there are some decent editing tools included with this application for cleaning up digital noise and distortion.
- PIXLR. This online application is often compared to PhotoShop Express and it has some similar features for editing along with enlargements.
- Online Photo Editor. Not many applications are simpler and more straight forward than this one when it comes to enlarging and editing digital images.
- Simple Image Resizer. Image resizing without sacrificing quality is the main push of this application, which is focused only on resizing and no other editing aspects.
You can certainly give these online sites a try, they might provide you with what you need in a quick pinch. For better quality enlargements, you really need to download one of the imaging software programs we reviewed above.
Conclusion
Resizing and enlarging photos is pretty common among all persons who use digital images for various purposes. Being able to produce an enlargement without sacrificing image quality is an expectation that we all have when it comes to photo editing. To achieve the highest expectations of photo editing in relation to your knowledge and skills as well as what your budget will handle, you will need to choose the enlargement software solution which best suits your needs and also make use of some of our tips for improving enlargement quality.
Thanks to Josh Rose for the featured image.

Jamie Spencer
Latest posts by Jamie Spencer (see all)
- How To Make Money As A Kid In 2025 – 6 to 16 Years Old - December 9, 2025
- 17 Of The Best Google Adsense Alternatives 2025 - October 13, 2025
- How to Start a Successful Cryptocurrency Website - September 12, 2024
I have a face in a picture that I would like to have enlarged to identify the person with another photo. This is a famous picture & even iconic picture that needs enlarging to make a positive identification. I’m not a photographer. Do you know anyone that has the software that can enlarge a small face in an iconic picture for a positive identification? I’ve tried normal computers with normal software. Please let me know. This is a 75 year old mystery that needs to be solved by science. I know the person in the picture but that doesn’t mean anything unless I can get his face enlarged for a professional to make the identification with the pictures I have.