Whenever you think about WordPress SEO, Yoast is one of the first names to come to mind. There are a few other plugins that have closed the gap on Yoast’s dominance of the SEO plugin market, which is great as for years Yoast’s product has been falling by the wayside. But as it’s still the most popular WordPress SEO plugins around, I have decided to write this guide on how you can set up Yoast on your WordPress site.
Before you download the Yoast Plugin, please consider Rank Math. It’s free and as far as I’m concerned, it’s much better than Yoast. I got rid of Yoast from this site and 7 other sites that I own. Traffic from Google has increase on all sites, anywhere between 5 & 15%.
Search engine optimization is always evolving and Yoast seems to do “ok” to keep their plugin in line with current best practices. Their plugin offers your site decent value, especially if you’re a webmaster who wants to have a site with all the boxes crossed when it comes to SEO best practices. Whether you’re just getting started with SEO, or have been optimizing sites for years, this plugin has a little something for everyone.
Below we dive into why you might want to use Yoast across your site, the benefits of using the plugin, and give you an in-depth walkthrough so you can install and optimize the plugin on your own site.
Let’s jump in!
Why Should You Use Yoast
Spending time optimizing your site for SEO might seem like a waste of time. However, SEO isn’t something you’ll want to take lightly. Especially, if you want your website to succeed in actually getting traffic. Most websites need at least some form of traffic to stay in business. And some companies are almost entirely reliant on the search engines to power their businesses.
The team at Yoast takes a holistic view of SEO, which means they believe that SEO should permeate all aspects of your online marketing. For this reason, their plugin is extremely extensive and offers you a multitude of customization options.
If you’re currently running any off-site SEO campaigns, then you need your site to be fully optimized if you want to get the most from your efforts. Yoast SEO is a great plugin that’ll help you get there in the shortest amount of time possible (and with the least amount of technical know-how).
Features of Yoast SEO
Before we dive into installing and optimizing this plugin we’re going to look at some of the common features of this plugin.
- The ability to generate an XML sitemap
- You can edit your .htaccess and robots.txt files
- Website permalink control
- Allows you to import settings and data from other SEO plugins
- Can change your title and meta settings on a post and page basis
- Google search display preview
- Ability to index or not index certain sections of your website
- Verification and linking with Google Webmaster Tools
- Keyword optimization assistance
Once you begin to adjust the settings on your own website, you’ll start to see how many powerful features this plugin has to offer.
Beyond the features highlighted above, the premium version of the plugin has even more additional extensions and tools for those serious about their SEO efforts. Let’s look at a few of them below:
Additional video tutorials to take your use of the plugin to the next level.
- A dedicated support team provided by Yoast, who’s there to answer any and all plugin-related questions you might have.
- A built-in redirect manager that enables you to setup and manage redirects.
For the sake of keeping things simple, we’re only going to focus on optimizing your site while utilizing the free version of the plugin.
Installing Yoast SEO
To get things started you need to install the plugin. To do this simply navigate over to your WordPress Dashboard and hover over the “Plugins” tab, then click on “Add New”. On the right-hand side of the screen, you’ll see a search box. In this box type in Yoast SEO.
It should be one of the first (if not the very first search result), then click the ‘Install’ button. This will bring up a plugin install screen, and once it’s done being installed you’ll click the little blue link that says ‘Activate’.
This will get the plugin up and running on your site. You’ll notice a little logo that says ‘SEO’ on the bottom-left side of your site.
Now it’s time to get to the fun part of using this plugin to optimize your website.
Setting Up Yoast SEO
Don’t be afraid of the multitude of settings this plugin offers. We know it can be overwhelming to first-timers, but that’s why we created this guide. Stick with us until the very end and you’ll have a perfectly optimized site that’s ready to dominate in the search engines.
1. General Settings
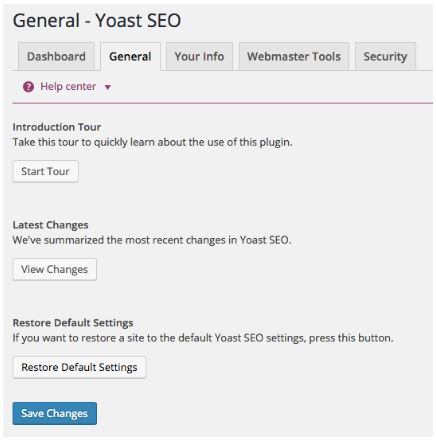
To get to your general settings navigate to Yoast>SEO> Dashboard. Then click on the ‘General’ tab at the top. Here you’ll be able to take a tour of the plugin, see any major changes they’ve made to their plugin, and restore to the factory default settings (if you’ve made some changes you want to erase).
Your info
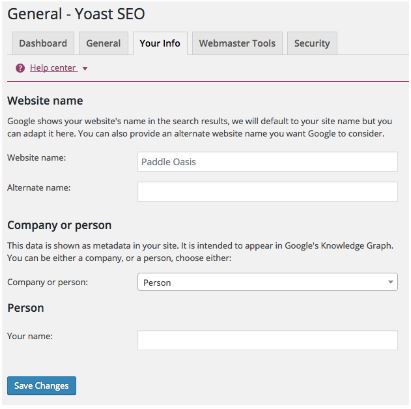
On the ‘Your info’ tab, you can adjust your website name and even give an alternative name for your site. You can also add a company or a person, which will help to improve your search engine presence for the Google Knowledge Graph.
This is a new feature of Google’s search results, which displays either to the right or on top of the normal search results. This can be a great source of additional traffic to your website if optimized properly.
Webmaster Tools
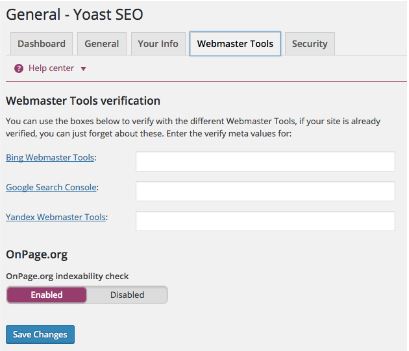
If you’re currently using Google Webmaster Tools, or any other of the tools listed above you can link your accounts here. These tools will help provide you with analytics data and insight into how your site is performing across the various search engines.
Security
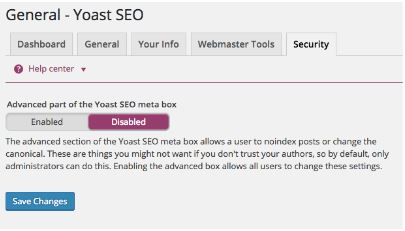
If you run a multiple-author blog, then you might want to limit access to post customization. Enabling this setting will only allow those who have administrator access will be able to set redirects, canonical URLS, and other noindex settings.
2. Titles & Meta Optimization
The next section you’ll want to optimize is the Titles & Metas section of your website. The settings you adjust here will influence what your site and posts look like when they display in the search engines. Optimizing these settings is crucial for your search engine click-through-rates. To adjust these settings navigate to Yoast> Titles & Metas.
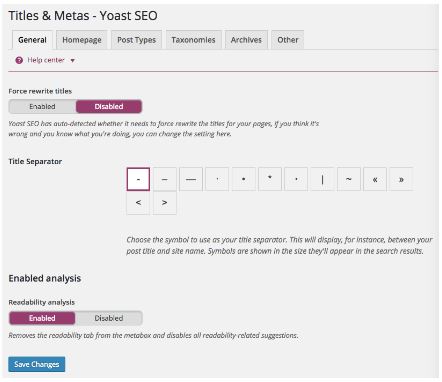
On the main screen, you can enable whether you want the plugin to force re-write titles, or not. The plugin will usually auto-detect whether or not it needs to force re-write the titles, so you usually won’t have to adjust this setting.
It can be very beneficial to turn on the ‘Enabled Analysis’ section. This will give recommendations at the bottom of every blog post or page you create to improve the readability of your blog posts.
Homepage
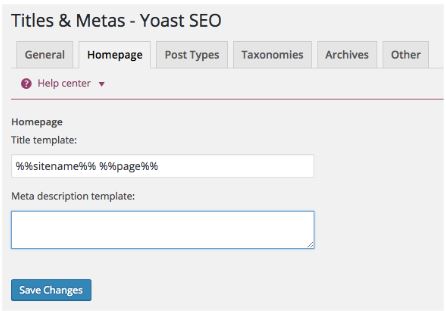
We recommend adjusting the ‘Title template:’ as it’s reflected in the above image. This will give you more space to optimize your title and make your title that much more clickable in the search engines. You can also adjust your meta description, which will display if your home page ranks in the search engines.
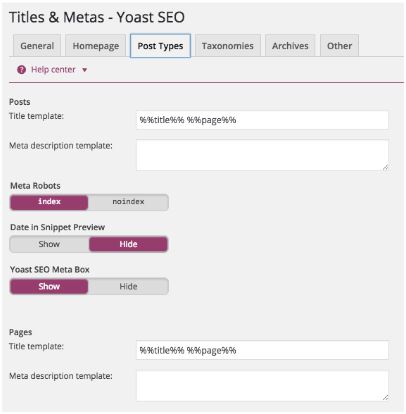
The ‘Post Types’ section will enable you to adjust how your post and page titles display in the search results. Once again we recommend adjust your ‘Title templates’ to reflect what’s shown in the image. The rest of the checkbox settings can be left as-is.
When setting up post titles it’s recommended to have your post title first, followed by your site’s name. Any other information the title is just taking up space and potentially distracting your visitors.
Taxonomies
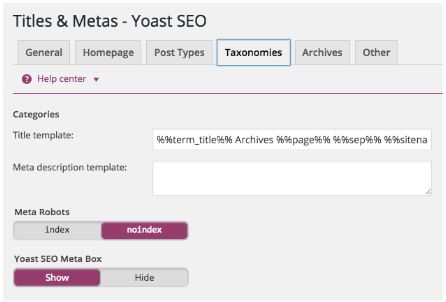
WordPress already creates some default taxonomies. So, you normally won’t need to create any more. The existing title format for these sections should be fine.
However, we do recommend switching the ‘Categories’ and ‘Tags’ sections to noindex. This will prevent Google from indexing these pages in the search results, as they normally won’t provide much value to your visitors. However, this depends on the structure of your site and if you category pages actually provide value.
Archives
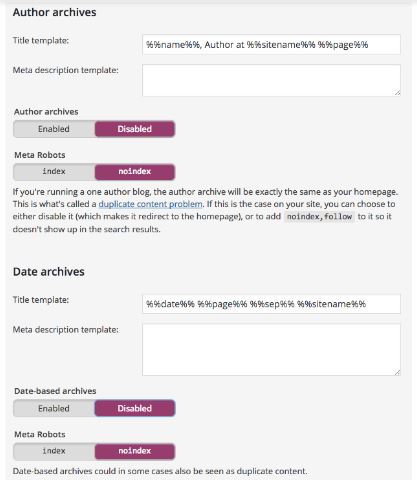
This section will enable you to adjust the titles that are displayed for your archive pages, should you choose to enable them. You’ll notice a few different types of archives that are created by WordPress: author archives, date archives, special pages, and 404 pages.
To reduce the chances of duplicate content occurring we recommend setting ‘Author archives’ to Disabled and noindex. Same for the ‘Date archives’, which really don’t provide any value to the search engines.
Other
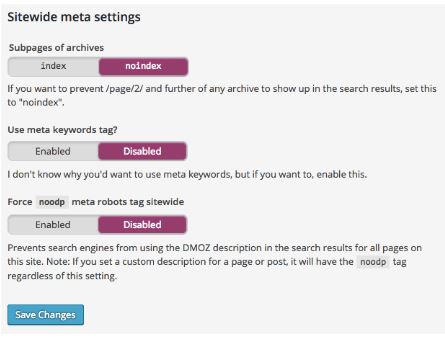
The final tab in the Titles & Metas section offers you a few more settings to tweak. By leaving all of these settings turned off, as shown in the image above, you’ll help to clean up your search results and avoid having unnecessary elements clutter up your post title.
3. Social
Social media is going to play an increasingly large role in SEO well into the future. Yoast integrates nicely with almost every existing social media platform. On the main screen, you’ll be able to enter your profile URLs for whatever social media networks you’re active on.

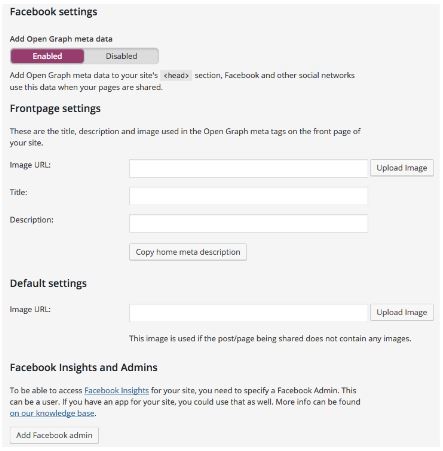
On the Facebook tab you can configure your Facebook Open Graph meta data. This will give you more options for configuring your post for Facebook from within the WordPress editor. If you have a Facebook page you can even add your Facebook Admin to get extra insights about page traffic.
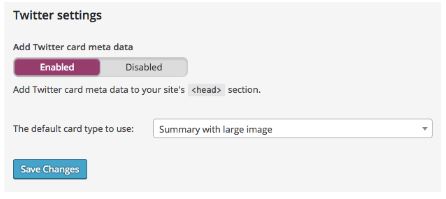
On the Twitter settings tab you can change how you would like the Twitter card to be displayed when you share a post. Choosing the ‘Summary with large image’, tends to get a much better conversion, than having just a title alone.
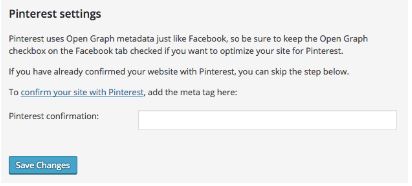
Pinterest uses the same Open Graph meta data, just like Facebook. You’ll need to have the Facebook meta information enabled for Pinterest to work. Once you do that you’ll have to confirm your site with Pinterest and you’re all set.
Google +
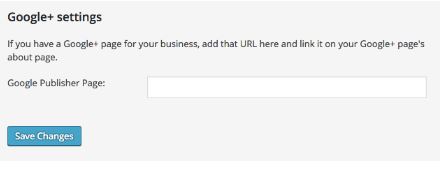
If you have a Google+ business page, then you can link to that profile here. Then, you can add your site’s URL to the about page of your Google+ profile.
4. XML Sitemaps
XML Sitemaps helps Google and other search engines to more effectively index your content. Think of this as a map the search engine bots can use to crawl your site and see when you’ve updated your website.
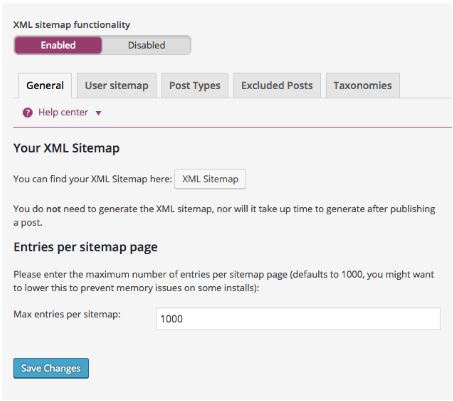
On the first screen make sure that your XML sitemap is enabled. Then, you’ll need to click on the box that says ‘XML Sitemap’, and copy and paste that link into your Google Webmaster Tools account. This will link the two together, so data is shared between the two platforms.
User sitemap

If you have a multiple author blog featuring a lot of authors who are very active, then you can generate author-specific sitemaps. We find this unnecessary, however, and choose to leave this option disabled.
Post Types
In this section, you can choose what kind of post types you’ll want your sitemap to include. We recommend mirroring the settings we’ve selected above. In most cases, it doesn’t make sense for any of your site media to appear in your sitemap.
Excluded Posts
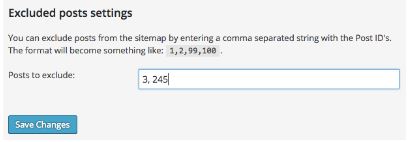
If you have certain posts that you know you don’t want to include in your sitemap, and have Google crawl, then include the Post ID’s in the box. You may need to enable Post ID’s with a plugin like Reveal IDs, if they don’t show up automatically. The ID’s will then be displayed on the ‘All Posts’ tab of your WordPress dashboard.
Taxonomies
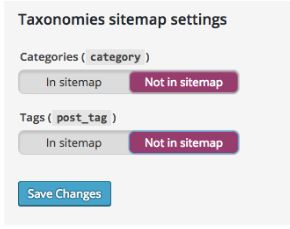
In the final section, you can decide whether or not you want to include certain categories or tags within your sitemap. We’ve chosen to not include categories or tags within our sitemap, but it depends on the overall structure of your site.
5. Advanced
The advanced settings of Yoast SEO will help take your SEO efforts to the next level. These settings are very simple tweaks, but they can be very beneficial to your site. The Advanced settings tab will let you change the Breadcrumbs, Permalinks, and RSS.
Breadcrumbs
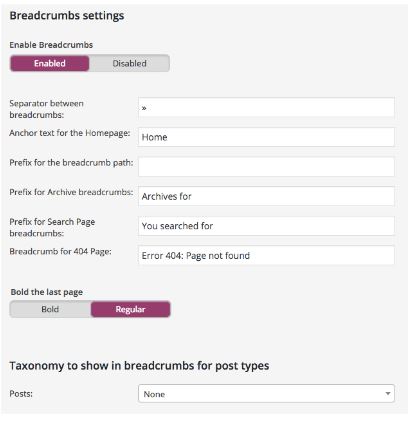
Breadcrumbs showcase the path the user will take to the desired page. For instance, Home>Blog>Guides. They can help to flesh out the appearance of your search results and help the search engines get a better idea of the structure of your site.
For a more detailed breakdown of how to implement breadcrumbs in your existing theme, check out this post from Yoast.
Permalinks
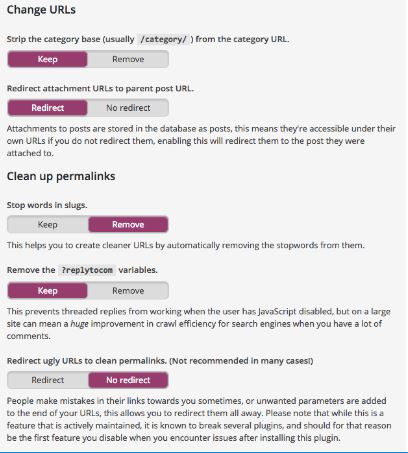
Adjusting your permalinks is an important aspect of having an SEO-friendly URL. However, the settings that Yoast enables build upon your existing permalinks structure. So, make sure you’ve already changed those.
If you haven’t, then follow the steps below, before proceeding with the Yoast optimization. Navigate to Settings> Permalinks, then switch your settings to ‘Post name’. This will give you a much better foundation to work from.
Then, we recommend using the permalinks settings shown in the image above.
RSS
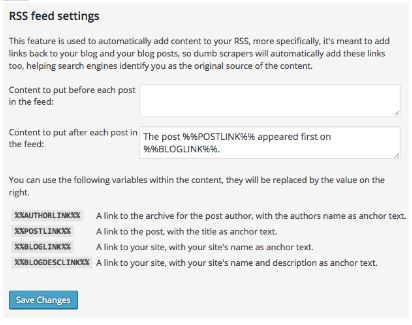
The RSS feed settings will add a link back to all of your blog posts, so if your content happens to get scraped, so readers and the search engines will know that you’re the original source of the content.
The original settings, shown in the image above, should be enough, or you can add additional link elements using the values at the bottom.
6. Tools
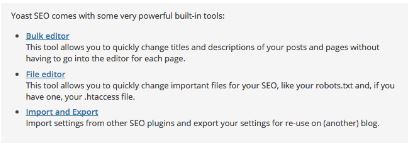
This is another very useful feature of Yoast SEO. You can use the bulk editor to edit both post title and post descriptions in bulk. However, make sure you’re not creating duplicate descriptions, as this can hurt your SEO.
The file editor will allow you to change information in your robots.txt and .htaccess files. However, we don’t recommend editing these files unless you actually know what you’re doing. Changing these files can make your site unreadable by the search engines.
Finally, the import and export function allows you to import your settings from other SEO plugins, if you were using one before you switched over to Yoast. You can even create a backup of your Yoast settings if you’d like to save them just in case.
7. Search Console

The Search Console will link your site to your Google Webmaster tools account. First, you’ll have to add your site to your Webmaster Tools account, then you can enter the authorization code to link the two together.
Click ‘Get Google Authorization Code’ and you’ll be redirected to a window where you can get the code. Then copy and paste the code into the box and you’re all set.
This will help to give you better tracking information and you’ll be able to keep better tabs on any crawl errors that might occur. It’s important to fix these errors as soon as you’re aware of them.
If you have the premium version of this plugin there are additional features for you to customize. However, we believe the free version of this plugin can be more than enough for most beginner and intermediate website owners.
8. Optimizing Your Content
Yoast SEO truly shines when it comes to per-post and per-page optimization. Now that you have all of the base settings completed, you’ll want to optimize each page and post as you create it. This will help to perfect your onsite SEO. It might seem like a lot of work upfront, but once you get in the habit of it, it’ll become second nature.
Plus, you’ll be well ahead of your competitors who aren’t spending this much time on their onsite SEO. If you have any older content it’s also a good idea to go back and optimize them using the tips below.
Optimizing Posts and Pages
At the bottom of each post, there will be a box called Yoast SEO. This box will allow you to fully optimize each piece of content you create around a specific keyword. Yoast’s analysis tools will analyze the post you’ve written and give recommendations to further optimize each post around a keyword of your choice.
We’ll break down the main post optimization sections below:
Snippet editor
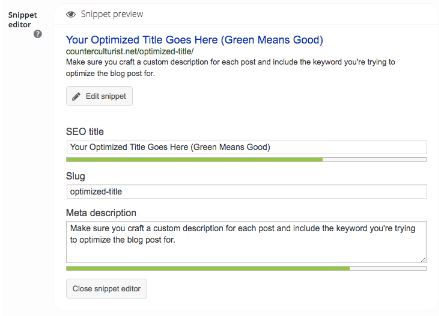
The Snippet editor allows you to edit all of the post information that’s displayed in the search engines. This is your chance to optimize for both readers and the search engine bots. Their analysis tool makes it easy to craft an SEO-friendly title, slug, and meta description.
When creating your snippet, remember, green means good.
Focus Keyword
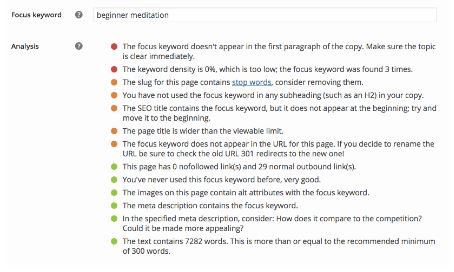
The focus keyword and analysis sections allow you to input your keyword of choice and see how your optimization efforts stack up against the current best-practices. The more green you have in your analysis the better. However, you can still have stellar optimization without every single circle being green.
Readability
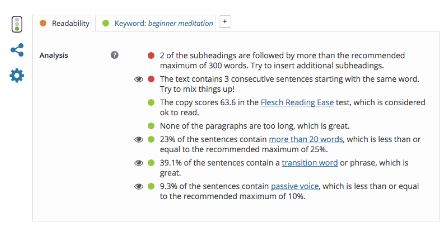
On the next tab there’s also a Readability section. This breaks down how easy it is for readers to digest your post. Having content that’s easy to read the will improve the user experience, which can also improve your rankings by increasing time spent on site, and lowering your bounce rates.
9. Optimizing Your Categories
Finally, you can further optimize your category pages around specific keywords. If you’ve followed through this entire tutorial, then you’ve already done some basic category page optimization, but you can take this even further by optimizing the Yoast SEO box.
The process is very similar to the process for posts and pages above. Make sure you optimize your SEO title, slug, and meta description. Also, finish the focused keyword analysis and try to get as many green circles as possible.
The settings you select on your individual pages will override the more general settings you selected. This allows for even greater levels of customization and keyword optimization, taking your onsite SEO efforts to the next level.
In Closing
As you can see Yoast SEO is an extremely powerful SEO plugin. In terms of its levels of customization and integrity with this latest search engine updates, we believe this is one of the most powerful SEO plugins on the market (and this includes the free version).
Optimization can be a lot of work. But, this plugin simplifies the process and enables you to easily achieve solid onsite optimization. This plugin is also useful in that it educates you throughout the process, so you understand the why behind the actions you’re taking as well.
This plugin won’t help you rank automatically in the search engines, but this plugin combined with solid keyword research and offsite SEO will help you rank much easier.
What about you? Any Yoast SEO optimization tips or tricks we missed? Share your best in the comments below.
Jamie Spencer
Latest posts by Jamie Spencer (see all)
- How To Make Money As A Kid In 2025 – 6 to 16 Years Old - December 9, 2025
- 17 Of The Best Google Adsense Alternatives 2025 - October 13, 2025
- How to Start a Successful Cryptocurrency Website - September 12, 2024
Hi Jamie.
Thanks for the advice on RankMath – i am going for it.
Deleting Yoast right now!
Thank you very much Jamie, I truly appreciate this guide. My Yoast SEO settings have been total garbage. But now, it’s much better with your guide.
Big thanks to you for such great tips. After reading your article, I’ve done my setup again and now It’s working like charm. Thanks a ton for this awesome post!
Thank you for the great tips. I only have a few sites at the moment, but after reading your SEO article, I think I have a little room for improvement on my titles and descriptions.
Great tip. I switched from All in one SEO to Yoast as they seem to be constantly improving and optimizing the plugin.
We start using Yoast by SEO, but now we change instead of All in One SEO, I like the simplicity of options.
But Yoast still has powerful tools if you know it deeply.
I still prefer Yoast.
You have written a great post. I am currently using the free version of the yoast seo plugin which allows me to optimize my posts for a particular keyword.
I want to move to the premium version. I read somewhere that the premium version allows you to optimize your post for multiple keywords. I like you to tell.me of it is true.