Is your current web hosting not cutting it?
Or, maybe your site is receiving too much traffic for your current host and your site is performing slowly as a result. Whatever the reason you need to migrate to a new host, and you’d like your migration to leave little to no downtime.
Even the thought of migrating your site to an entirely new host can be stressful. However, the experience isn’t as bad as it seems. Sure, it does take a lot of prep work, but by following the steps below you’ll be able to migrate your WordPress site to a new host in the most seamless manner possible.
Below we dive into how you can easily move your WordPress site from one host to another. The process is a little technical, but it isn’t anything you shouldn’t be able to handle.
Before we move forward it’s important to mention that most hosting providers do offer WordPress migration services. Usually, these won’t be advertised, but you can get in touch with support and they’ll point you in the right direction. The cost of these services will differ depending upon your current hosting provider and the host you’re switching to.
One more thing. You can backup and migrate over your site through a few different means. The most common involve using FTP software and doing the backup yourself, or utilizing a plugin like BackupBuddy to handle some of the heavy lifting for you.
Since we want to remove all possible hurdles in switching over your site, we’re going to show you how to migrate your site without the help of a paid plugin.
Full Affiliate Disclosure: When you purchase a web hosting package through links on this page, we earn some commission. This helps us to keep this site running. There are no extra costs to you at all by using our links. The list below is of the best cheap web hosting packages that I’ve personally used and tested.
1. Choosing Your New Host
Choosing the right web host for your needs is a big decision. Since you’re switching to a new host this probably means you’re dissatisfied with your current hosting provider, or you’ve outgrown what they can provide for you.
Below we profile a few of our favorite hosting providers, to help you make the most informed decision possible. Ultimately, the decision you make is up to you, but any of the three below are great choices.
Bluehost

Bluehost is a great choice for those seeking a simple shared hosting environment. Of course, shared hosting isn’t perfect for every kind of website, especially if you’re receiving high levels of traffic, but it can be a great place to start.
As a bonus shared hosting usually offers the most setup assistance when it comes to getting your site up and running.
If you’re looking for a cheap hosting solution for a newer website, then Bluehost is one of the best beginner WordPress hosts out there.
Plus, Bluehost is actually on the list of hosting providers that WordPress recommends to their users. You can’t get a higher recommendation than that, especially if your site runs on WordPress.
WP Engine
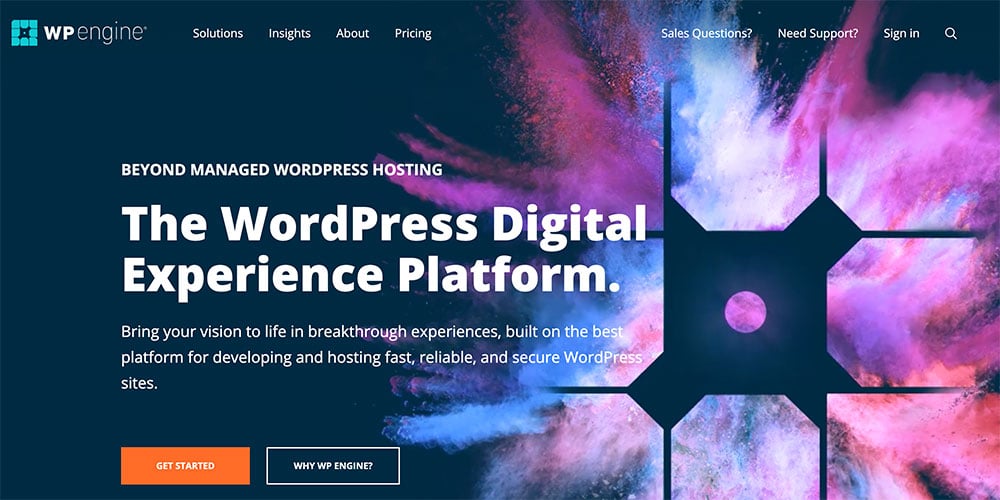
If you’re looking for a more extensive and customized hosting environment, then WP Engine might be a great choice for your needs. WP Engine is a managed WordPress hosting environment, which means that they handle everything for you. A lot of big WordPress websites trust WP Engine to provide them with the level of support their sites require.
WP Engine is the equivalent to having a team of WordPress experts on your side, optimizing your site, managing your hosting environment, and protecting your site from the onslaught of online threats.
Some offerings included with a WP Engine hosting package include:
- Automatic security updates
- Daily website backups
- High-level of WordPress security
Plus, WP Engine is great for sites that are looking to scale. They’re a hosting provider that can grow with your website and doesn’t hold you back if your traffic levels continue to grow.
According to many hosting reviews WP Engine’s support staff is consistently rated one of the best.
They also provide a very easy to use hassle free blog migration service with their own custom WordPress plugin.
SiteGround
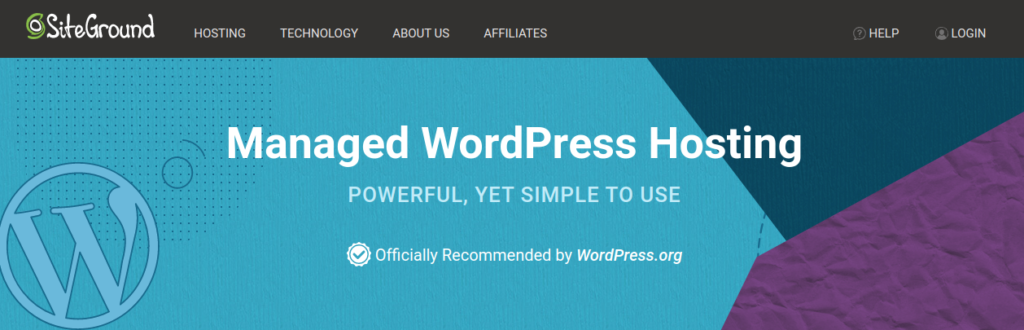
SiteGround is a managed WordPress hosting environment, which means all of the technical aspects of the hosting environment are taken care of for you. If you’re a very technical person and love the challenge of setting up and customizing your own servers, then this probably isn’t for you.
But, if the thought of having all of the heavy technical elements of your site taken care of fills you with glee, then it’s worthwhile to pursue this option. Face it, as a website owner you have a lot on your plate, do you really want to add managing your server to this list as well?
In terms of managed WordPress hosting they do offer some of the most flexible options. Some managed WordPress hosts are set in stone and don’t allow any customization whatsoever, this hosting provider isn’t one of those.
They have very fast host performance and have a variety of hosting options to suit your needs. Plus, SiteGround has already been around for 10 years, so you know they’re doing something right.
CloudWays
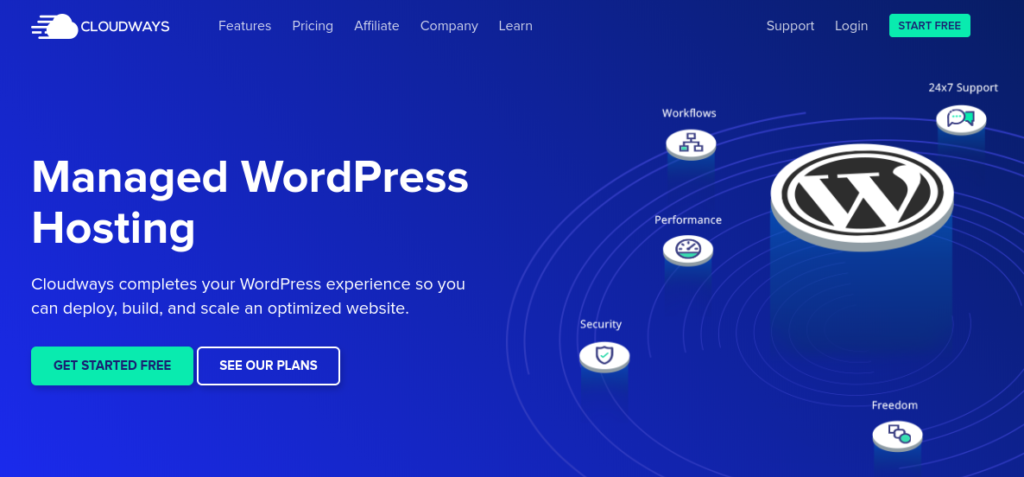
Cloudways is a managed cloud host that allows you to deploy WordPress through the cloud deployment of your choice. With Cloudways you can choose either Digital Ocean, Linode, or Amazon AWS to deploy your site. It’s not solely a WordPress host, as they offer other CMS and site options, but once you deploy WordPress your hosting will be managed.
Best of all there are no restrictions on your WordPress site, which a lot of other hosts employ. Typically, cloud hosting platforms can be difficult to manage, but with the Cloudways managed solution it’s literally as easy as pushing a few buttons.
Have you chosen your new host yet? Good, let’s move forward.
2. Backing Up and Migrating Your Existing WordPress website
It’s important that you actually purchase your new hosting before you move forward with the switch. You’ll need to have login credentials with your new site to actually make the site transfer.
Once you’ve made the decision about which host you’re going to use it’s time to backup every element of your website. This is a good thing to do on a regular basis, just to ensure you can restore your site in case something tragic happens. But, it’s absolutely necessary to do before you move forward with any of the steps below.
When the time comes to backup and migrate your site you’re going to be able to use a FTP client like, Filezilla, or the cPanel that comes with your existing host. We’ll outline both methods below.
Migrating Using Filezilla
If you’re going to utilize an FTP manager like Filezilla, then follow the steps below. First, download and install the free software from this link. To move forward you’ll need the login information for both your current and new hosting accounts.
1. Connect to Your Site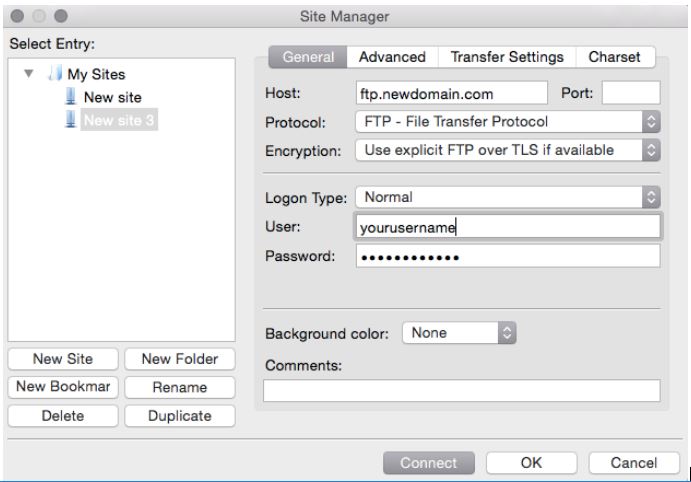
Connect to your existing site. If you’re unsure how to do this, take a look at this tutorial from WordPress. To connect you’ll need the username and password you were given to connect to your account.
2. Navigate to public_html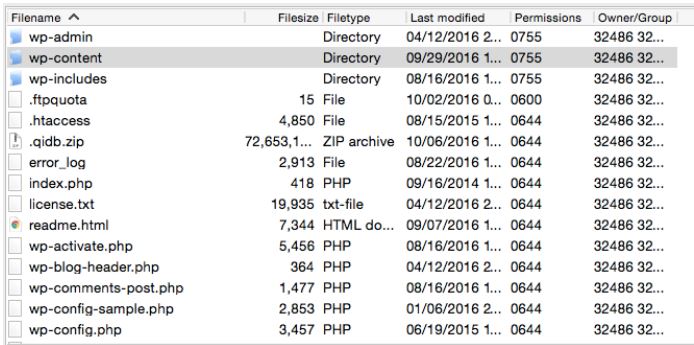
Once you’re browsing through your site’s files navigate to the public_html file. This is where all of your site’s files are contained. Download all of your existing site’s files. This can take some time depending upon the size of your site and your Internet connection.
3. Upload to Your New Host
Once all of the files are downloaded, you’ll want to login to your new host. Navigate to your public_html folder for your new domain and upload all of the site files you just downloaded.
If you downloaded the right files, then your new site will be migrated to your new host.
Migrating Using cPanel
Transferring your site via cPanel is much faster and can be less intimidating. Plus, it doesn’t require installing any software on your local computer. But, it only works if both your existing host and new host are utilizing cPanel.
1. Locate the File Manager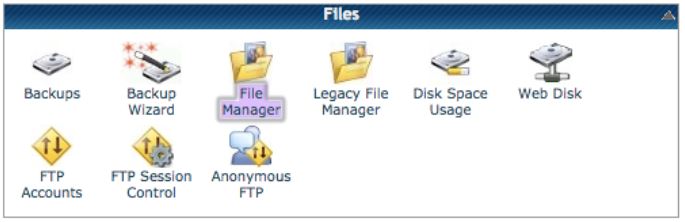
The first thing you’ll want to do is locate the ‘File Manager’. This is where all of your site’s files will be held. Double-click to open this.
2. Download Your Site’s Files
Inside the file manager locate the public_html folder, then click on the folder where all of your site’s information is contained. This will either be the public_html folder, or it’ll be named something like yourdomain.com, depending if you have multiple domain installs.
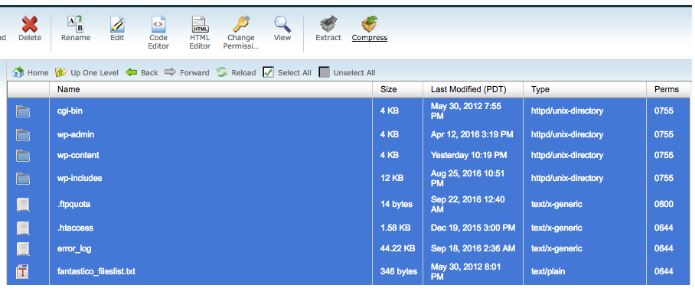
Click ‘Select all’, then ‘Compress’.
Then, create a .zip file and save the zip file to a same location on your computer. It can also be helpful to create a copy of this file and store it in a safe place as a website backup.
3. Create a New Domain On Your New Host
Now, you’re going to login to your cPanel in your new host. If you haven’t done so already, then you’ll want to add your domain to your new host.
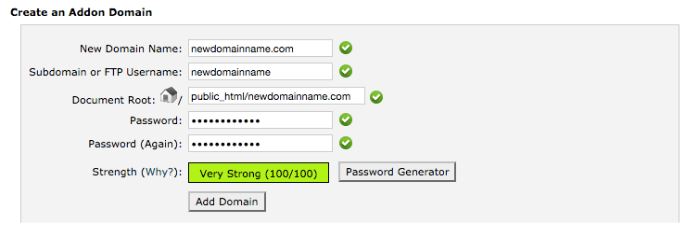
Navigate to ‘Addon Domains’
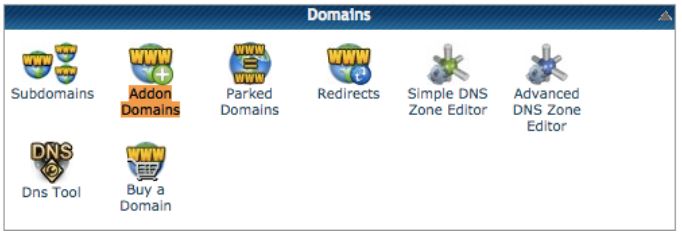
On the next screen you’ll add your new domain name. Fill out all of the necessary details and click ‘Add Domain’.
4. Upload Your Old Site to Your New Host
You’ve made it to the final step. Now you’re going to add the files you downloaded above to the new domain you’ve just created.
Navigate back to your ‘File Manager’ and navigate to the public_html folder of the new domain you created. Now you’ll upload the .zip file to that folder and use the built-in unzip function.
If you’ve done that successfully, now you’ll have migrated your site’s content to your new domain.
If you’ve followed all of the steps above, then your new site should be correctly uploaded to you new host. Now, all you have to do is move over your WordPress database to make the file transfer complete.
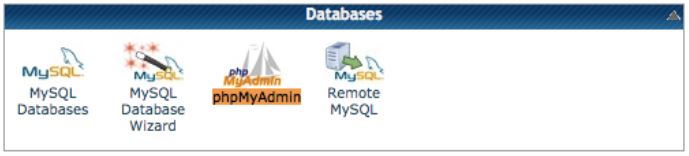
5. How to Move Your WordPress Database
The final step of the site transfer process involves moving over your WordPress database to your new host. To do this we’ll be using a tool called ‘phpMyAdmin’.
In your cPanel navigate to ‘phpMyAdmin’, as shown in the image below.
1. Find the Right Database
On this screen you might see a bunch of different databases listed. If you’re not sure which database you’ll need to access and download, then follow the steps below.
Navigate back to your site’s files via ‘File Manager’ and find a file called wp-config.php. You can open this file using the built-in code editor, or your editor of choice. With the file open look for a line of code titled: define(‘DB_NAME’, ‘the name of your database’). This will show you the name of the database you’ll want to download on the previous screen.
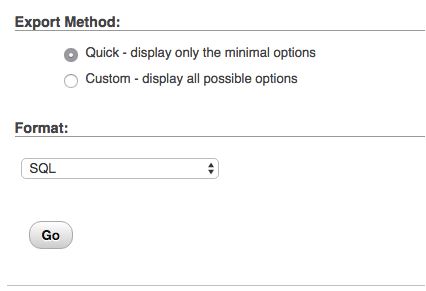
2. Export Your Database
Select the database you found in the step above and select the ‘Export’ option on the top navigation bar, then click on ‘Go’ and save it to your computer.
3. Login to Your New Account
Now, login to your cPanel on your new hosting account, and look for an app titled ‘MySQL Database Wizard’.
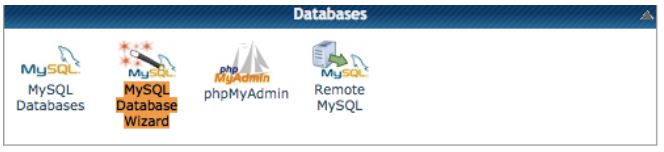
The setup wizard will walk you through the process of creating a new database. This will create an empty database which you will fill with the database information you downloaded earlier.
Make sure you keep track off the new database information as you create it, you’ll need this information to complete the final step in the migration.
4. Import Your Database
To fill in your empty database you’ll want to access the ‘phpMyAdmin’ app in the cPanel of your new host. Now, navigate to the empty database you created earlier and select upload from the top navigation menu.
Find the database you downloaded from your old host and click ‘Go’. This will upload your old database to your database on your new host.
Now, you just have one final step to go.
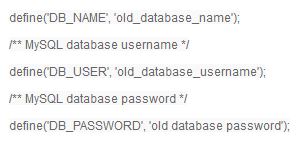
5. Update Your Configuration File
The final thing you’ll need to do is update the wp-config.php file on your new host with your latest database information.
Navigate to your ‘File Manager’ and locate the file titled ‘wp-config.php’. Open this file and you’ll need to change three things: your database name, username, and password. You’ll have created these in step number three above. It’ll look something like the image below.
Once you’ve updated those you can save your file and the migration process will be complete!
6. Switching to Your New Nameservers
If you want to avoid any downtime in switching over your site, then this should be the final step in the process.
The final step in the website migration process is switching over your nameservers. To do this you’ll need to login to the dashboard of your existing domain name provider.
When you signed up for your new host you should have received an email that contains your nameserver information. Your nameservers will commonly look like this:
ns1.mynewhost.com
ns2.mynewhost.com
Find your existing nameservers, then simply copy over your new nameservers, then click save. Sometimes it can take up to 24 hours for your nameservers to point to your new host, but usually they’ll transfer over immediately.
For a quick review, to ensure you’ve completed every step of the process we’ll review them, so you can make sure your transfer goes smoothly:
- Choose a new host and sign up for a new hosting package.
- Backup and download a copy of your site’s files via cPanel or Filezilla.
- Login to your new host and create a new domain (if needed) and upload your site’s files via cPanel or Filezilla.
- Download your WordPress database through the tool phpMyAdmin.
- Create a new WordPress database with your new host through MySQL Database Wizard.
- Upload your downloaded database into the empty database you’ve created.
- Change your wp-config.php file using Filezilla, or File Manager inside cPanel, and update the information to reflect your newly uploaded database.
- Finally, change your nameservers to those provided by your new hosting account.
If you’ve successfully completed every step outlined above, then you’ll have successfully migrated your WordPress site.
In Closing
Hopefully, the steps above will help you seamlessly migrate your site from one WordPress host to another. If the above process is to technical for you, you can always get in touch with your new host, and often they’ll walk you through the migration process, or will even do it for you for a fee.
At the very least, the information above will help you understand the host migration process a little better, and what actually happens behind the scenes.
Jamie Spencer
Latest posts by Jamie Spencer (see all)
- 50+ Ways To Advertise Your Business For Free On The Internet – 2024 Guide - April 5, 2024
- How to Start Your Own Podcast - April 2, 2024
- Uber Stats 2024 – All The Numbers & All The Facts - April 2, 2024
Awesome, this helped me out a ton by turning what looked to be difficult into a quick process. One thing I’d suggest for anyone wanting to simplify further — when you’re looking at the wp-config.php file to figure out your DB_NAME, just copy the name, username & password to reuse when you’re setting up your new database so that wp-config.php works without modification.
Will it affect ranking?
It can do. Site speed is a ranking factor. I moved my sites to a dedicated servers and a few low traffic ones to Bluehost and have seen vast increases in traffic ever since.
Hi Jamie, I have a .com I want to test this out on my .net. But when I follow all your steps my .net (without a 301 redirect) get redirected to my .com. How can I change this so I can see the new WP on my .net? I’m testing this out before I move my WP .com to a new hosting provider. Thank you.
Sounds like the site addresses aren’t updated yet. There are two ways to fix that. The first way is go to general settings and update the site addresses. If they are disabled, you’ll have to update them in the file ‘wp-config.php’. (Just search for everything with .com and replace with .net) Does that help?
Jamie, I have a question about using one of your infographics, the social media layout one, in a free information product we are promoting. Can I contact you by email? Thanks
Sure. Send me an email to hello at makeawebsitehub dot com
thanks you for help me i have one word-press website and try to move another host. great work thanks you again