Jetpack is one of the most popular plugins for WordPress and it includes a variety of tools to help you improve and grow your website. However, as Jetpack offers so many features, it can be hard to gain a good understanding of what it offers and whether it is a good choice for your new WordPress website.
The purpose of this Jetpack Guide is to de-mystify Jetpack and to introduce you to some of its best modules. By the end of this article, you will know whether Jetpack would make a good addition to your new website or blog. And you will have a good understanding of which modules to activate.
What is Jetpack?
Jetpack claims to be the ‘ultimate toolkit for WordPress’. This free plugin includes a suite of modules that can enhance your website in many ways. Some of this functionality covers improving your WordPress site security, increasing traffic and helping you customize your site’s design. As Jetpack was created by Automattic, the same team that runs WordPress.com, by installing this plugin you can gain access to some of the features that websites hosted on this service enjoy.
The main appeal of Jetpack is that it provides all the features and functionalities required to run a successful WordPress website in just one package. So instead of having to research, install and set up multiple tools, all you need is Jetpack’s one plugin. Site stats, state of the art security services, traffic generation tools, and design customization functionality are just some of the advanced features provided by Jetpack.
While the core Jetpack plugin and the majority of its modules are free, there are some advanced optional premium tools available. However, the free version provides more than enough tools to get started with.
How to Install Jetpack on Your WordPress Website
Before you can activate any of the Jetpack modules you will need to install the core plugin on your WordPress website.
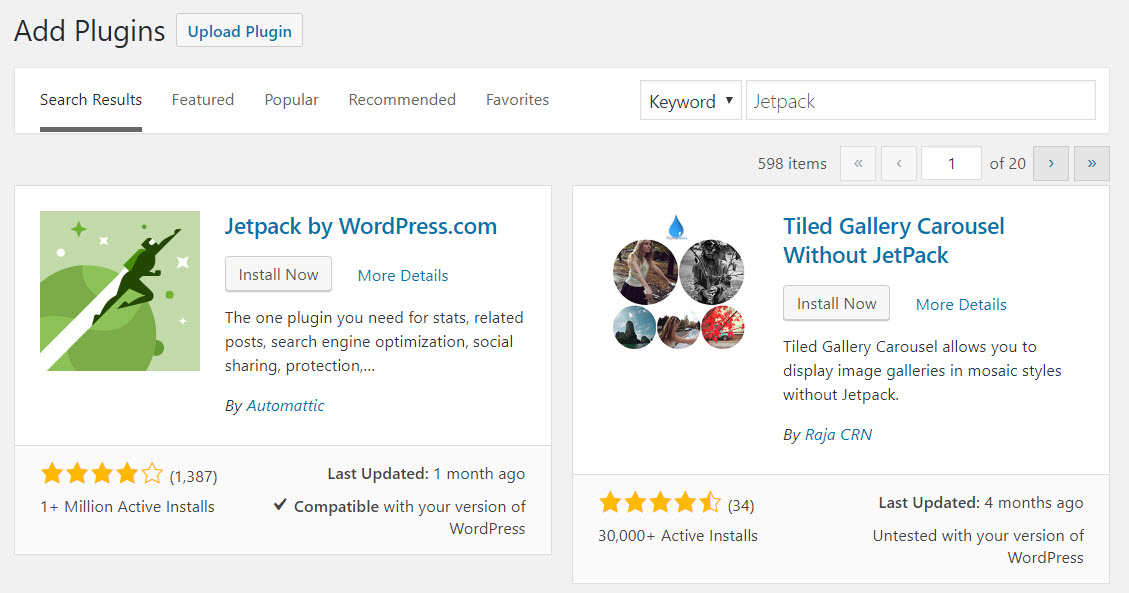
Log in as admin on your site. Then within your WordPress dashboard, select ‘Plugins > Add New’ from the menu bar.

Type ‘Jetpack’ into the plugin search bar. Once the Jetpack has been retrieved, click on ‘Install Now > Activate’.
You will now be asked to connect your website with WordPress.com. Here you can create a new account with WordPress.com. Or if you are already signed up with WordPress.com you can add your website to your existing account.

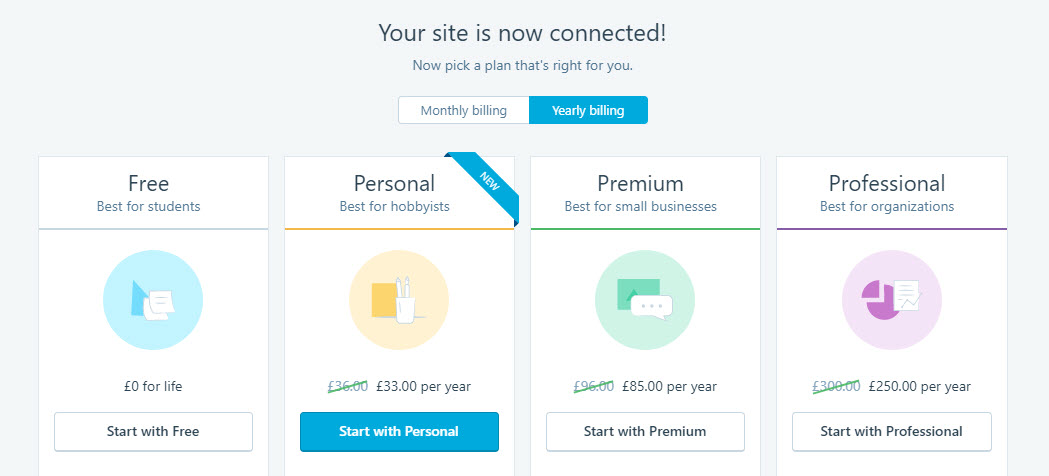
Once you have registered, WordPress.com will ask you which Jetpack plan you would like to opt for. For now, simply select the ‘Free’ plan.
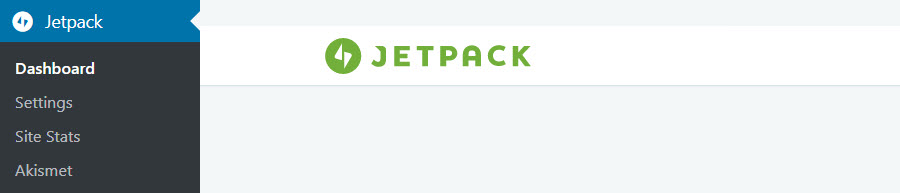
You will now be returned to your WordPress dashboard, where you will see that a ‘Jetpack Menu’ has been added to your site’s menu bar.
Activate Jetpack’s Recommended Features
Once your plugin is installed the first thing Jetpack encourages you to do is bulk ‘Activate’ their recommended features. Most of these features are in fact turned on by default when you install the plugin and can be de-activated if you so choose.
But before you choose to activate all these recommended tools, or turn them off, let’s find out what each of these Jetpack modules offers. And how they can help improve your WordPress website…
Sharing
In your WordPress menu select ‘Jetpack > Settings’. This is where you can find and activate, or deactivate, the numerous Jetpack modules.
Select the ‘Sharing’ tab. You will now see two different ‘Sharing modules’ that Jetpack recommends activating.
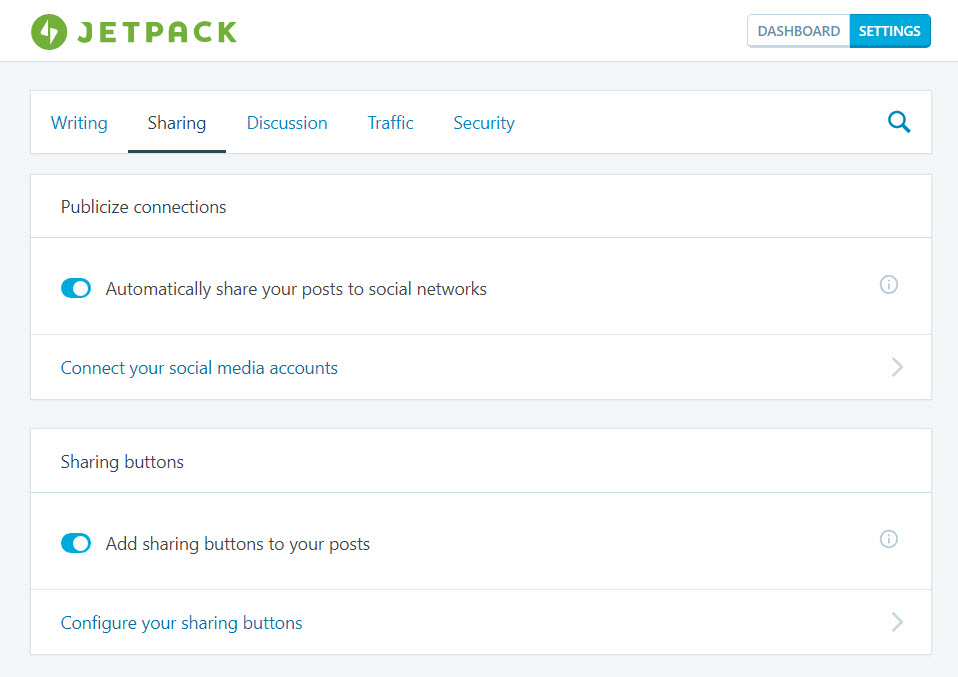
Publicize Connections
‘Publicize Connections’ allows you to automatically publish blog posts to your social media channels. To add this feature to your WordPress website, click on the ‘Activate’ button under ‘Publicize Connections‘. Then select ‘ Connect Your Social Media Accounts’. You will now be taken to your WordPress.com account, where you must connect and authorize any social media networks you would like to automatically publish your blog posts to.
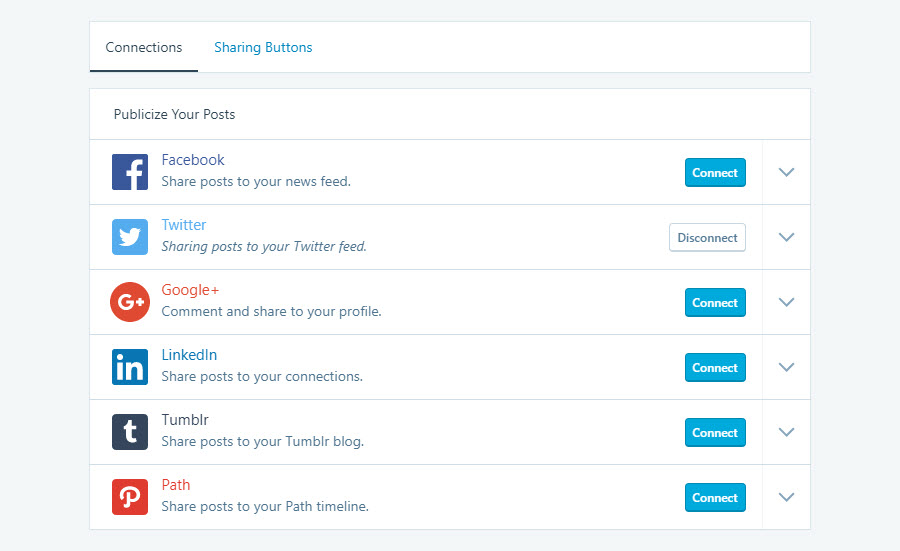
Once set up, articles will be automatically displayed on your social media networks each time you click to ‘publish’ an article on your site. You can also add a custom message to be sent out with each post.
Activate Publicize Connections if you would like a quick and easy way to publish your posts on social media and get your content shared. Upgrading to Jetpack’s paid plans will also allow you to reshare, as well as schedule, your blog posts for social media publishing.
Read: Social Media Image Sizes Guide
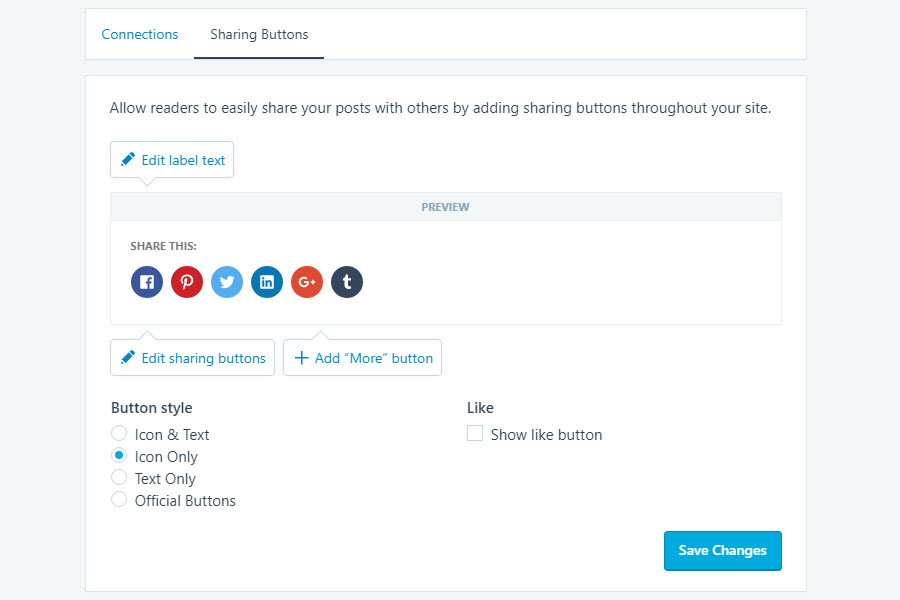
Sharing Buttons
‘Sharing Buttons’ will add social media sharing buttons to your WordPress posts. This will help your readers share your content on their social media networks, and enable your articles to connect with a wider audience.
To set up this feature, select the ‘Activate’ button under ‘Sharing Buttons’, then select ‘Configure Your Sharing Buttons’. Within the WordPress.com dashboard, you can choose which social media buttons you would like displayed, alter the look of the text and icons, and decide where you would like the buttons placed.
Sharing Buttons is another great social media Jetpack module and a must have for those looking to get their content shared.
Subscriptions
Subscriptions’ has been created to make it easy for visitors to subscribe to your content, and for you to collect users emails. Under ‘Jetpack > Settings’, select the ‘Discussion’ tab to find the ‘Subscriptions’ module.
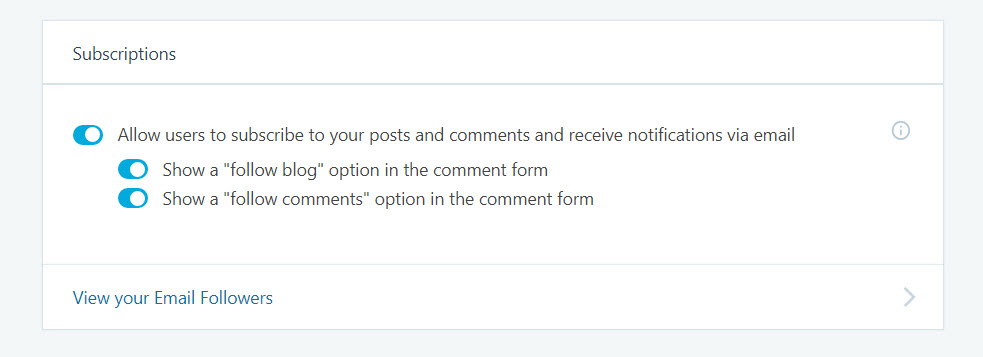
By activating ‘Subscriptions’ on your website, visitors have the option of subscribing to your blog. They can also follow individual article’s discussions. WordPress.com stores the collected emails and visitors are automatically notified via email of new comments or blog posts published on your site.
This is an extremely effective way of collecting leads and keeping in contact with your audience. By sending emails to keep your audience informed of what is happening on your blog, they are more likely to return and become regular readers.
Gravatar Hovercards

A gravatar hovercard is the card that is displayed when you hover over a person’s gravatar. This displays information about the person, including their full name, a blurb about them, and a link to their full profile.
Using gravatars, and their hovercards, is an effective way to help foster an interactive community on your WordPress website. Visitors get to know each other by recognizing each other’s gravatars and reading up on each other. This creates a bond between your readers, and a feeling of familiarity with each other and your blog.
To activate Gravatar Hovercards, select the ‘Discussion’ tab. Under ‘Comments’, activate ‘Enable pop-up business cards over commenter’s Gravatars’.
Contact Form
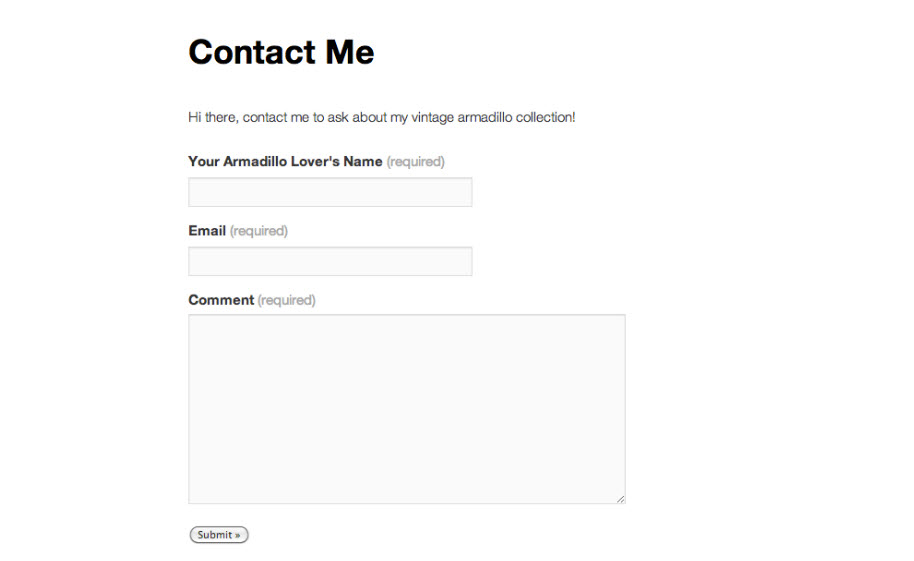
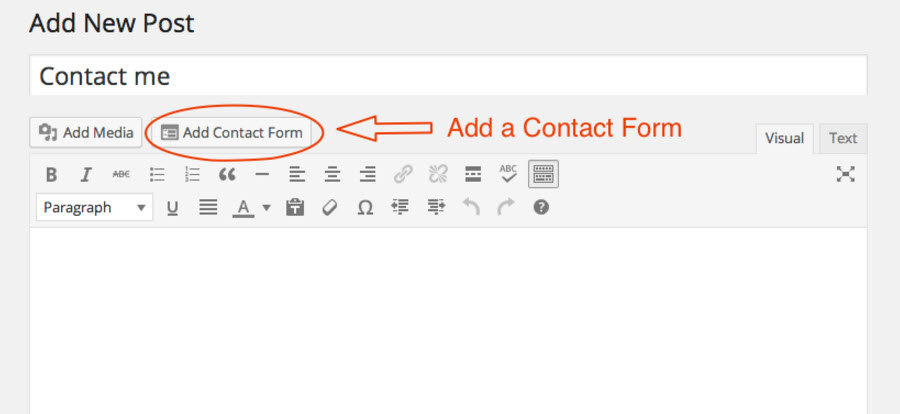
Jetpack’s ‘Contact Form’ module enables you to add attractive contact forms to any page, post, or widget, of your WordPress website. Forms can be customized, enabling you to edit the fields displayed, alter the email address, or change the subject settings. The appearance can also be tailored to suit your site’s design using CSS, and existing forms can be re-edited.
To add a contact form to your website simply open the specific page or post where you would like a form displayed. Above the editor, click on the ‘Add Contact Form’ icon. A pop-up will appear where you can configure the form. Then publish the page and your contact form will go live.
For each contact form response you receive you will be sent a notification email. And responses will be stored in the ‘Feedback’ section of your WordPress dashboard. So if you are looking for a simple, yet clean and sleek contact form, then make use of this easy to use Jetpack module.
Photon
Site speed is an important factor for all websites. Large images particularly can greatly slow your website down. Photon is an especially useful Jetpack module that helps deal with this problem.
Photon is an image acceleration and editing service. It works by serving images to your audience directly from the WordPress.com cloud. This means less load on your host and a much faster image delivery for your site visitors.

To activate Photon, simply switch to the ‘Writing’ tab on the ‘Jetpack Settings’ page. Scroll down the page to ‘Media’ and then activate the button next to ‘Speed up images and photos’. Photon is another must have Jetpack module, especially for websites that are image heavy.
Carousel

Carousel adds a fun and stylish dimension to your images and makes it easy for your visitors to view individual pictures. If you decide to use the Carousel feature, all images that are currently displayed in WordPress galleries on your posts and pages will be showcased in a full-screen carousel option.
To activate ‘Carousel’ on your WordPress website, click on the ‘Writing’ tab and scroll down to ‘Images’. Then turn on the button next to ‘Display images and galleries in a gorgeous, full-screen browsing experience’.
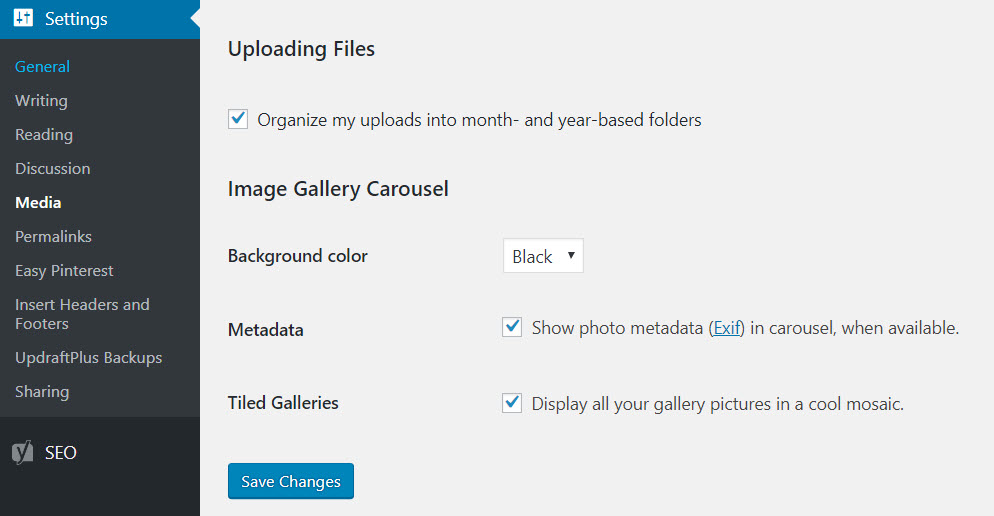
Here you can also select whether to show metadata in your carousel, as well as set a black or white background to complement your images. Carousel is a great choice if you already display WordPress galleries on your website, and are looking to improve the delivery of your images.
Tiled Galleries
Tiled Galleries allows you to display your image galleries in three distinct styles. You can choose from rectangular tiles, a square mosaic, or a circular grid. All three options provide an interesting and eye catching way to showcase your image galleries.
To set up Tiled Galleries, you first need the ‘Photon’ module that we have previously discussed to be activated. Then, when you create a new gallery, under ‘Gallery Settings’, select one of the three tiles options.
If you want you can make all of your image galleries tiled by default. In your WordPress dashboard menu select ‘Settings > Media’. Scroll down the page and under ‘Image Gallery Carousel’ tick to activate ‘Tiled Galleries’.
Tiled Galleries is another way to give your site an edge by displaying your images in stunning layouts. Activate this module if you want your photos and pictures to impress.
Related Posts

Displaying related posts underneath an article is an effective way to keep your audience on site. Showing visitors further information on a topic of interest will encourage them to click through to other pages to continue their reading.
The ‘Related Posts’ module scans and analyzes the posts on your website, and then displays related and contextualized articles at the bottom of each page. This tool differs from other related posts plugins as it processes and serves data from the WordPress.com cloud. This means that there is no additional load on your server.
To activate ‘Related Posts’, select the ‘Traffic’ tab. Then under ‘Related Posts’ activate the button next to ‘Show related content after posts’. Three related posts will now be displayed under each article, complete with thumb nail image and title. Jetpack also gives the option of adding a ‘Related’ header. This helps to show a distinct separation from the end of your post and the related suggestions.
Displaying related posts can dramatically increase your page views. So if your WordPress website has a thriving blog, then ‘Related Posts’ is a module well worth activating. The longer readers stay on your site and engage with your content, the more likely they are to return to read more at some point in the future.
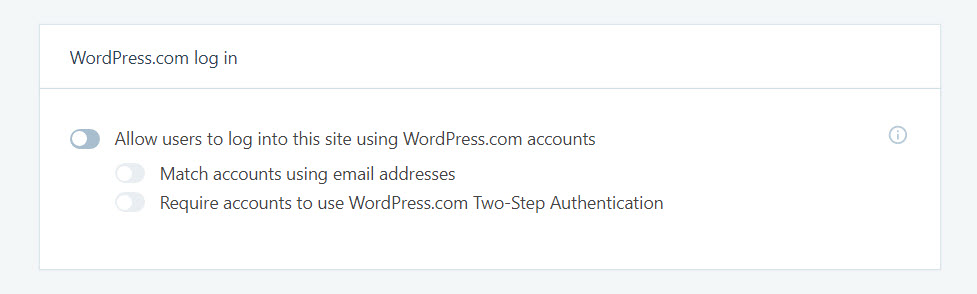
Single Sign On
‘Single Sign On’ can be activated under ‘WordPress.com log in’. This is found in the Jetpack Settings ‘Security’ section. Once you have turned on this feature you will be able to log onto your site via WordPress.com. For extra security, you can activate the ‘WordPress.com Two Step Authentication’.
The ‘Single Sign On’ module is again another useful Jetpack tool. Not only does it help speed up and secure the login process, it also takes the stress out of remembering yet another password.
Brute Force Attack Protection
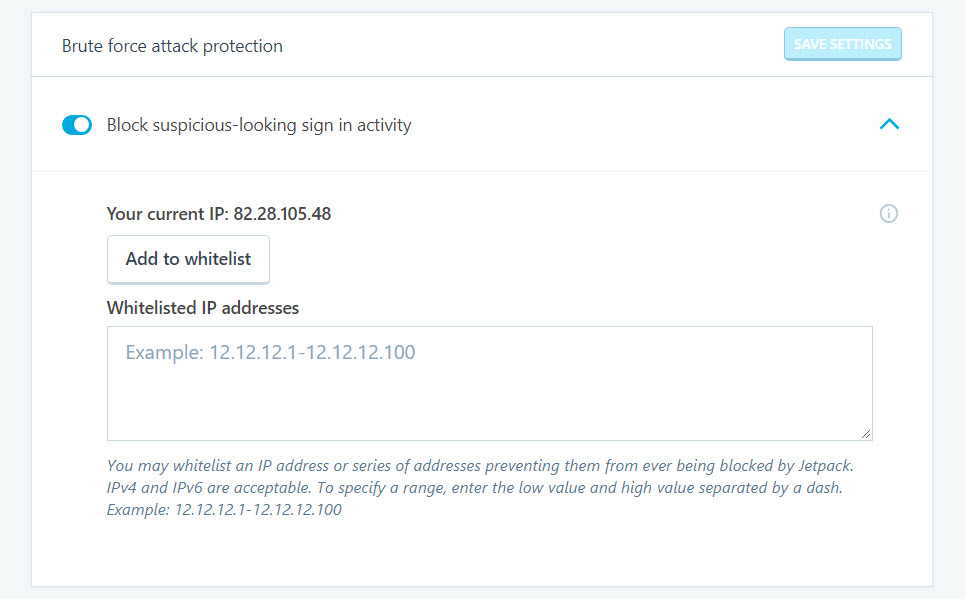
The security feature ‘Jetpack Protect’ is used to protect your WordPress website against brute force attacks. This module starts working automatically once you have connected your site to WordPress.com. It can also be found under ‘Security > Brute Force Attack Protection’.
Jetpack Protect works by blocking all suspicious looking login activity. You can view the number of thwarted attacks on your website by selecting ‘Jetpack > Dashboard’ from your WordPress menu. Jetpack also gives you the option of whitelisting your IP address, if you have made too many failed login attempts to your website.
This Jetpack module provides a necessary first line of defense for your site and will help protect your site from numerous malicious sign-in attempts.
Spelling, Style, and Grammar
Looking and sounding professional is crucial for websites representing businesses and career bloggers. So making sure the spelling and grammar is correct throughout your content should be a top priority.
Jetpack’s ‘Spelling, Style and Grammar’ module can be found under the ‘Writing’ tab. Activating this feature will enable Jetpack’s Proofreading technology to automatically check your writing in the Visual Editor. You can also configure the proofreading features, keeping the editing in line with your style of writing.
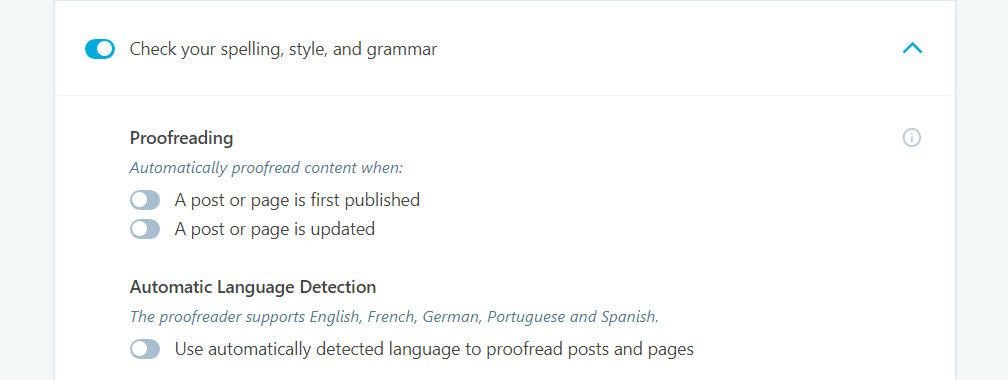
Activating this proofreading tool will ensure that your content is well written, and mistakes will be kept to a minimum. Ultimately, this will result in your visitors considering your blog to be a reputable source.
Site Stats
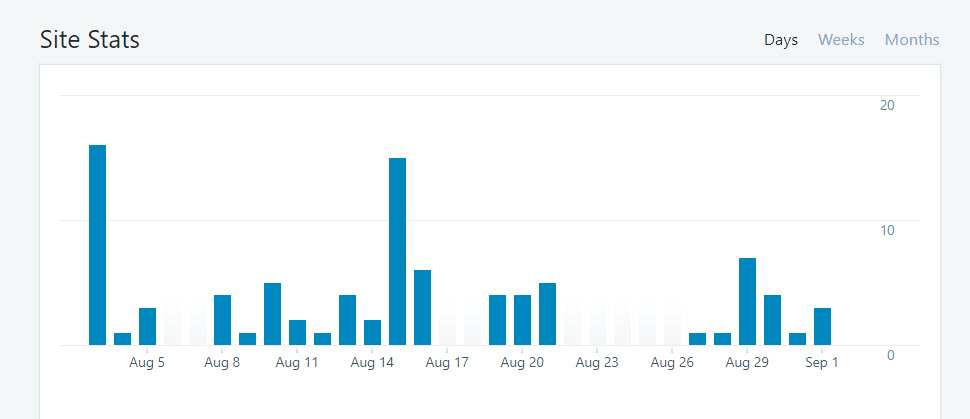
The ‘Site Stats’ tool tracks your site’s metrics and reports them in an easy to read overview. Find out how many visits your site gets, top posts and pages, the number of subscribers and likes received, and much more.
‘Site Stats’ is immediately activated once you link your website to WordPress.com. The stats report can be found under the ‘Jetpack > Site Stats’ page, and advanced stats are displayed in your WordPress.com dashboard. This module is a great way to monitor your site’s performance and gain an insight into what content is appealing to your audience.
Read: How to find out how much traffic a blog gets
Other Useful Jetpack Modules You Should Be Using
Apart from the initial ‘recommended’ features, Jetpack provides many other useful tools that can be activated as and when you need. These are not all available within your WordPress dashboard, so you will need to log in to your WordPress.com account to access the full range of Jetpack modules.
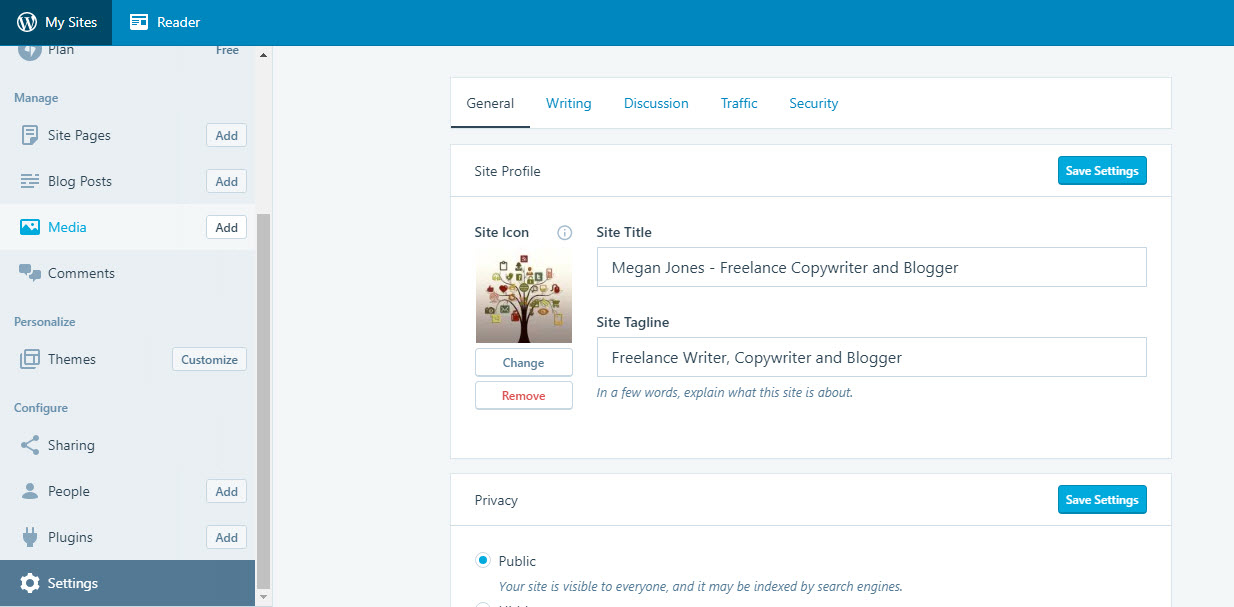
Once you have signed into WordPress.com, select the ‘My Sites’ tab. Then click on ‘Settings’ at the bottom of the side menu. Here you will find the full list of Jetpack features. However, which ones will make a real difference to your site’s performance? Let’s have a look at some other important Jetpack tools, that we haven’t yet mentioned, in more detail…
Mobile Theme
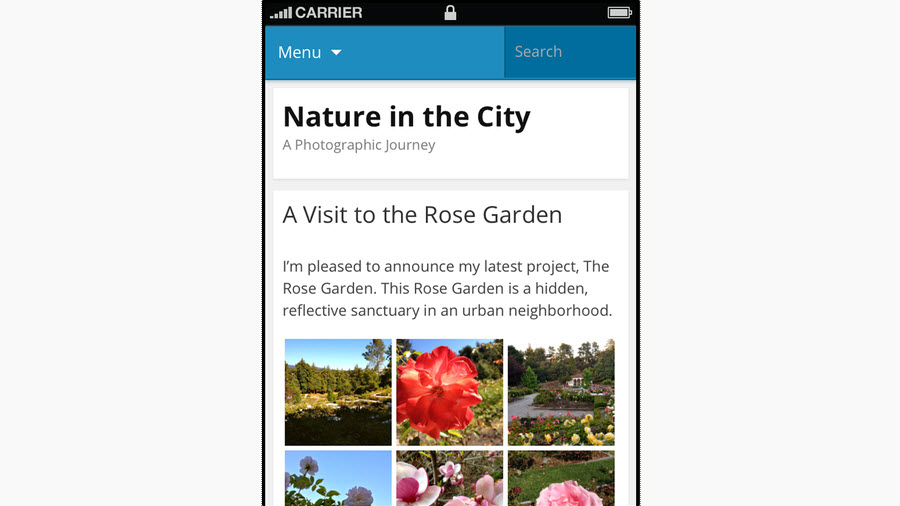
Using an old theme, or a theme that hasn’t been updated for a while, means you run the risk of having an unresponsive website. As more and more people access websites on handheld devices, it becomes ever important to have a responsive site. If you are unsure of how your website looks on a smartphone or tablet then check it out for yourself. Ultimately, an unresponsive website will lead to high bounce rates, low search engine rankings, and a loss of returning visitors.
Jetpack’s ‘Mobile Theme’ module converts your current website into a mobile-friendly version. The mobile theme displays a clean and organized interface, using a one column layout to give your content more room when viewed on a small screen. This helps improve the user mobile experience and ensures site visitors can access your content. It is also extremely lightweight, keeping loading times fast.
To activate the ‘Mobile Theme’ module, within your WordPress.com dashboard, select ‘Settings > Writing’. Under ‘Theme Enhancements’ click on the button next to ‘Enable the Jetpack Mobile Theme’. Here there are a few other options you can choose from, giving you some control over how your theme is displayed on mobile devices.
Infinite Scroll
Also located under ‘Settings > Writing > Theme Enhancements’ is Jetpack’s ‘Infinite Scroll’ feature. If your WordPress website has a healthy blog, that spans numerous page, then this may be a useful tool for your website.
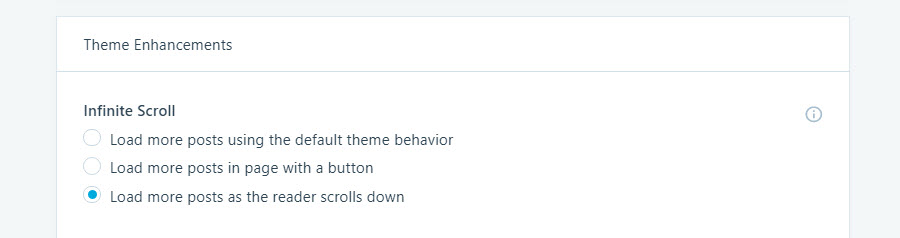
Infinite scroll enables your audience to quickly view unlimited amounts of information. As a visitor reads down the page, your blog will continuously display the next articles, without your audience ever having to load a page. This improves user engagement with your blog and helps increase time spent on site.
Monitor
If your website suffers from regular periods of downtime there can be serious consequences, including poor ranking in the search engines, and a loss of traffic. But unless you are on your site 24/7, it can be hard to keep track of just how often your website is offline.
Jetpack’s ‘Monitor’ tool monitors your website’s uptime. A WordPress.com server will check your website every 5 minutes and if your site has gone down you will be immediately emailed. A further email will be sent if your site is still down after an hour, and another email once your site is back up and running.
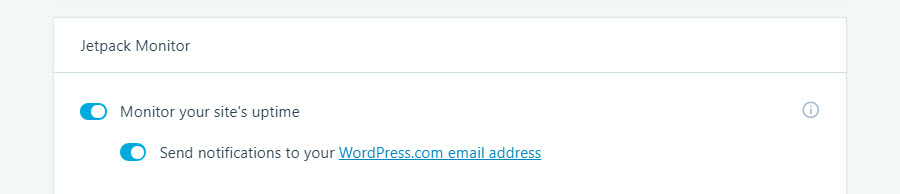
To turn on this module, log into your WordPress.com dashboard and select ‘Settings > Security’. Then simply activate ‘Monitor Your Site’s Uptime’. This is an effective way to track and consequently help fix your website’s downtime, improving your site’s performance.
Read: The best free and paid website monitoring tools
Comments
High numbers of comments on your blog will promote discussion and create an engaged community on your site. The Jetpack ‘Comments’ module gives your visitors the ability to leave comments on your blog using their WordPress.com, Facebook, Twitter, or Google Plus accounts.
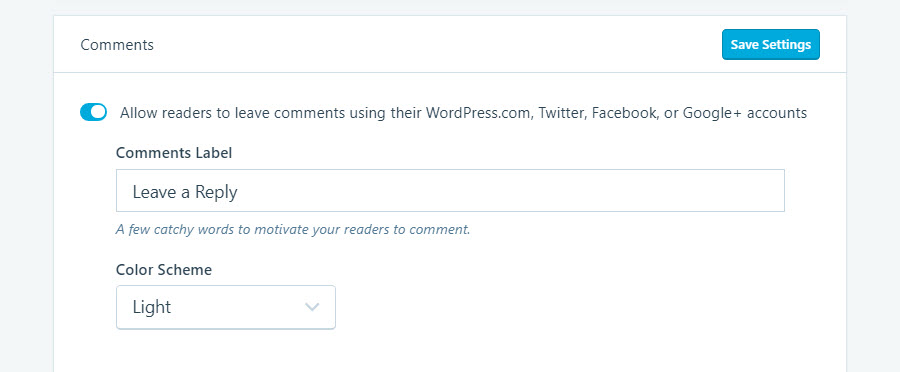
To turn on ‘Comments, within your WordPress.com dashboard select ‘Settings > Discussion’. Then select ‘ Allow readers to leave comments…’ By activating this feature, it suddenly becomes extremely easy for your audience to log in and share their thoughts on the article they have just read.
Sitemaps
Turning on ‘Sitemaps’ will help your website rank in Google, and other search engines. Sitemaps are files, that Jetpack will generate, which list each post and page that should be indexed by the search engines.
Within your WordPress.com dashboard, select Settings > Traffic’. Scroll down to ‘Sitemaps’ and activate ‘ Generate XML Sitemaps’. Jetpack will now automatically generate the sitemaps necessary.
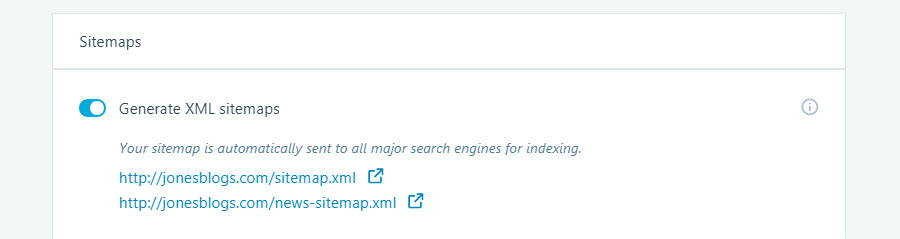
Jetpack can produce two sitemaps, one for all search engines, and one specifically for Google News. However, publishers must be pre-approved for Google News before Google will issue a News site map. If you want to apply to get your posts listed on Google News, check out the Google News Guidelines.
Read: How to Setup Yoast SEO
Free and Premium Themes
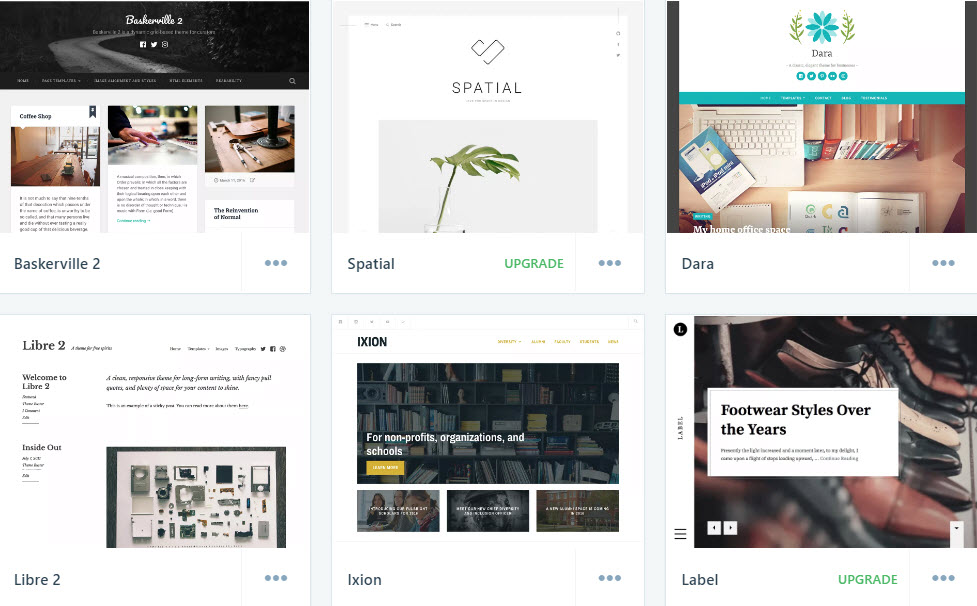
An added extra from Jetpack is a variety of free and premium themes that are available through WordPress.com. Jetpack offers over 150 free professional built-for-purpose and multi-purpose themes. And an additional 200+ premium themes are included if you upgrade to Jetpack’s ‘Professional Plan’.
These beautiful themes cater for a range of website needs, and can all be previewed and installed via your WordPress.com dashboard. If you are looking for a new design for your website, Jetpack may well have the perfect theme for you.
The WordPress.com App
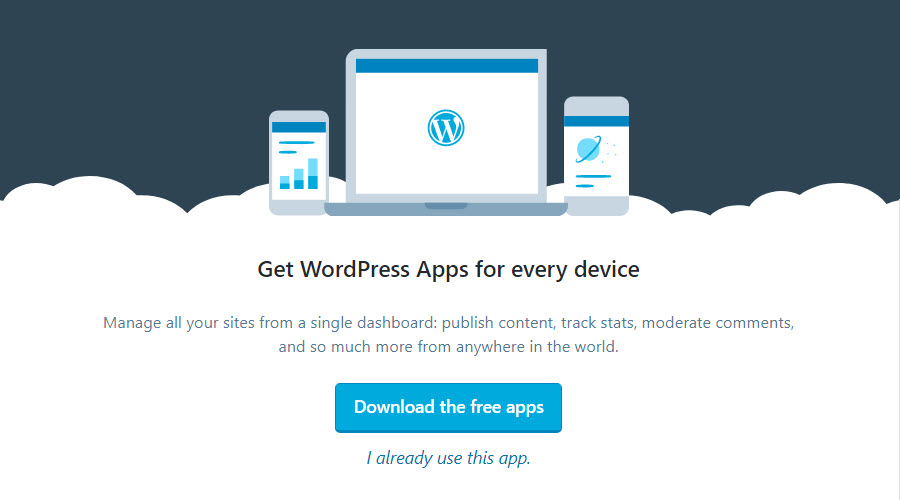
Another handy addition to the Jetpack suite of modules is the WordPress.com app. This app enables you to manage all your sites, from any one of your devices, and from any corner of the globe. Post from any location, check your site’s stats, connect with readers, and tinker with your Jetpack module settings, all from within the WordPress app.
The desktop app is available for Mac OS X (10.9+) and Windows (7+). Or download the mobile app on your IOS or Andriod. This useful app is ideal for those on the go. And will make it even easier to manage the many Jetpack tools used on your WordPress website.
Jetpack’s Premium Features
Jetpack offers three different premium plans, all providing advanced features and functionalities for your WordPress website. Here are just some of the extras they offer…
- Daily and Real Time Off-Site Backups
- Unlimited Backup Archive and Storage Space
- Automated Restores
- Easy Site Migration
- Daily Malware Scanning
- SEO Tools
- Unlimited Premium Themes
- Priority Support
Jetpack’s premium plans cater for all needs, from the humble blogger and small online store, to larger businesses and global corporations. If you are looking to fit out your WordPress website with the full range of tools it needs to be truly successful, then a Jetpack premium plan may be a good option for you.
Final Thoughts
As you can see Jetpack has a lot to offer. Hopefully you have discovered a few modules that will benefit your WordPress website. If in doubt, initially activate Jetpack’s recommended features. Then take your time activating new tools, and deactivating the ones you don’t need, as you see fit.
Which modules do you think you will activate? Please share your thoughts in the comments below…
Megan Jones
Latest posts by Megan Jones (see all)
- What is a Domain Name and How Do They Work? - March 9, 2023
- Using Google Analytics to Track Your WordPress Website’s Performance - September 17, 2021
- Using Jetpack on Your Self Hosted WordPress Website - September 4, 2017
Hi Megan, I don´t know if this is an old post or if this is still active, but I will write my question here. Maybe I am lucky and I receive your answer. So here it goes:
– I have a self hosted wordpress bases site and I use a purchased theme (Avada). Does this plug in Jetpack work with this configuration or is it useful only when you have a wordpress hosted site using a wordpress original theme?
I find a little confusing the fact that I have to use a wordpress.com account to use it and hence my question.
Thank you very much for your answer!
hi Jorge
Yes the Jetpack plugin will work fine with Avada. The reason you need a WordPress.com account is some of the services and features are run on the WordPress.com servers.
Jamie
Great post! all information in one place. I’m using jet pack for my blog and it’s really useful. The best about jet pack you get all the options with one plugin. I would recommend all newbies to consider installing the plugin. starting from email subscription to contact form it has everything. Thank you again for the detailed post.
So glad you found the article useful Jarvee, thanks for commenting!
So many features in just one plugin! This is great. Thank you so much for sharing Megan, will check their website to get to know more about it. Seem like it can be used for any WordPress website, considering that it has so many options that can be used for different purposes.